This guide is intended to help guide users in integrating their Swim domain with the Xero accounting platform. Before getting started with this guide, please ensure that you have a Xero account already setup with the corresponding organisation you wish to use for Swim. For assistance with setting up your Xero account, please follow the instructions in the following link:
https://help.xero.com/au/XeroSignup
1. To connect your Swim domain to a Xero account, click on the dropdown menu.
2. Click on the Integrations option
3. Click on the Xero button to open the Xero integration menu.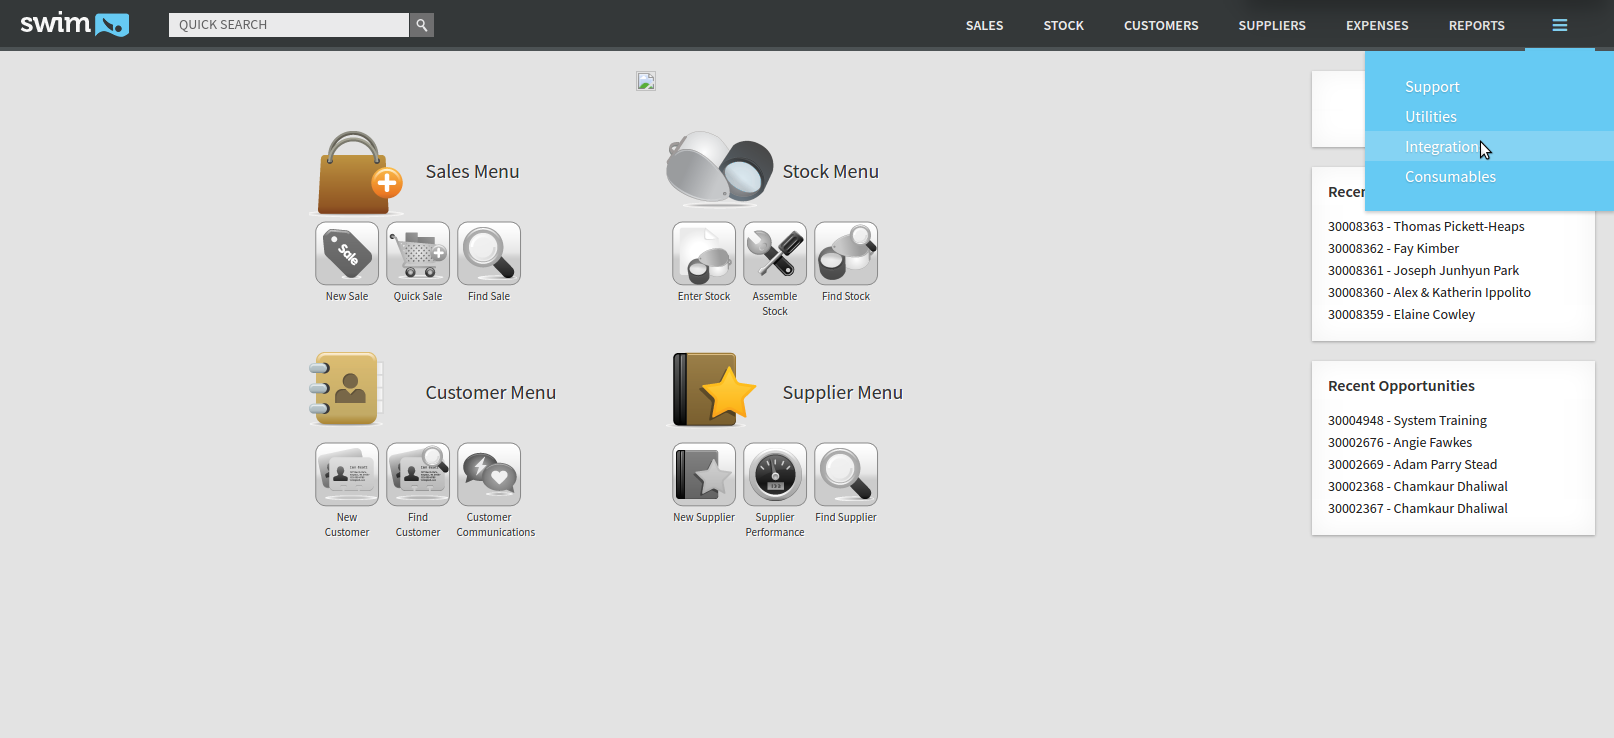
4. Toggle the enabled button to ON.
5. Click the Save Settings button.
Xero has now been enabled on your Swim domain, now we just need to connect it to your Xero account.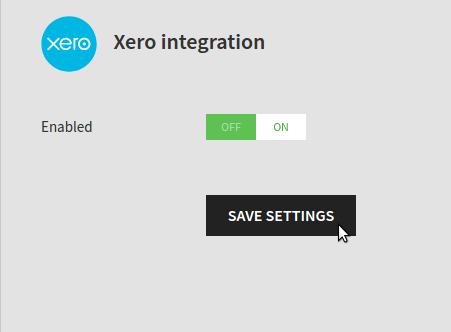
6. Having enabled the Xero integration in Swim, a “Connect to Xero” button should appear on the screen. Clicking this button will open a new tab in your browser. 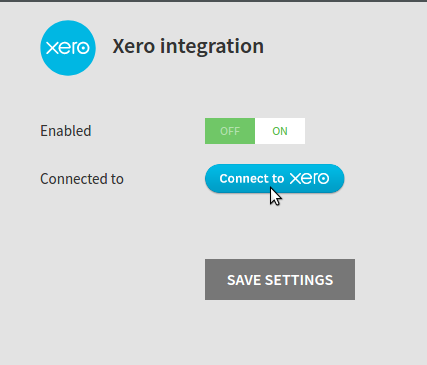
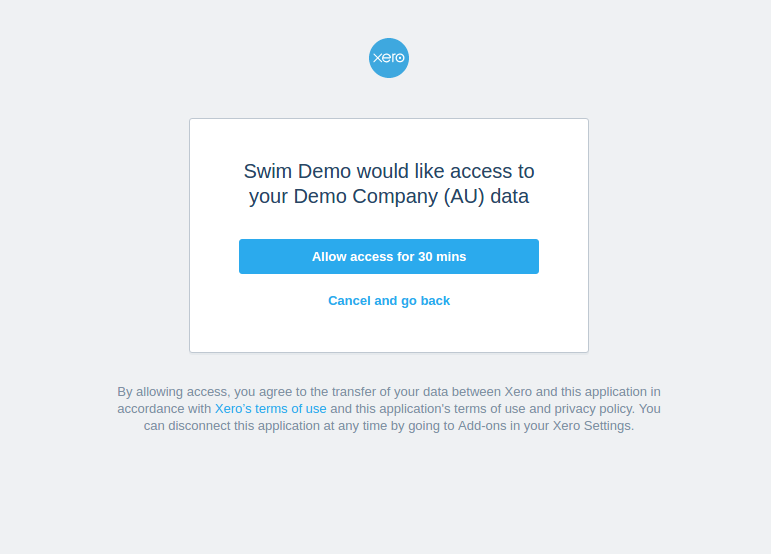
7. You should now be in a new tab that prompts you to authorise the Swim application by logging into your Xero account. (Note: If you are already logged into your Xero account, you might skip this step).
8. Enter your Xero account information here and click the ‘Login’ button.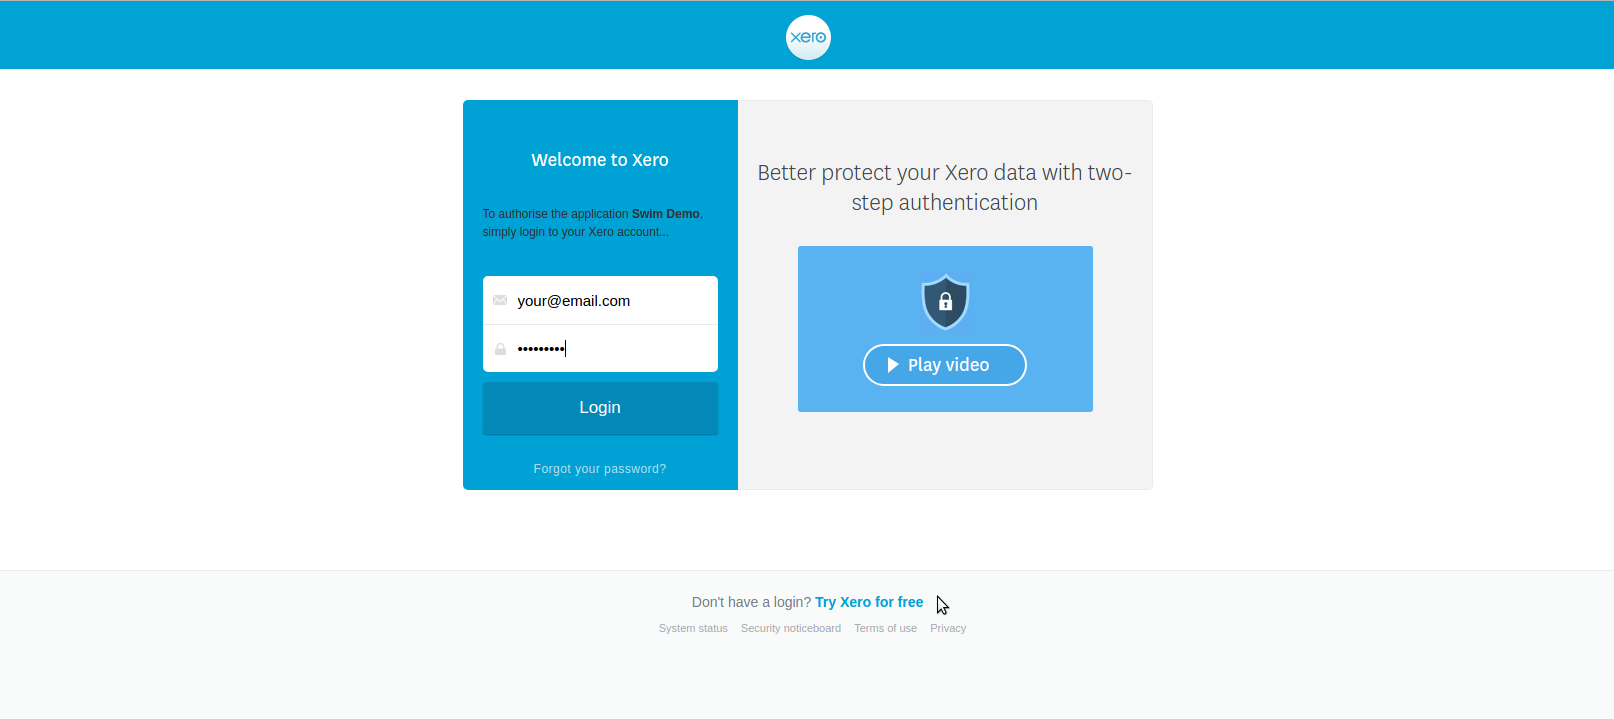
9. Having successfully logged into your Xero account, Xero will present you with a message asking you to allow access to your organisation’s Xero data. Click on the ‘Allow access for 30 mins’ button to finally enable the connection.
10. It is possible Xero will ask you to repeat this step, which you should do to complete the connection.
11. If the connection was successful, you will be returned to the Xero integration page on your Swim domain which will have updated to show some important details. Let’s step through what the updated page shows:
a) First, we can see the name of the Xero organisation that Swim has connected to. This indicates that the connection to Xero has been successful. This can be removed at any time using by clicking the X next to the organisation’s name.
b) Secondly, Swim shows there are some number of unmapped accounts. This is telling us that Swim has a number of GL accounts that need to be mapped to Xero. This will be covered in greater detail in the next section.
c) Lastly, we are shown that there are some number of unmapped tax rates. Similar to unmapped GL accounts, this refers to the Tax profiles we have setup in Swim that needs to be mapped to Xero. This also will be covered in greater detail in a later section.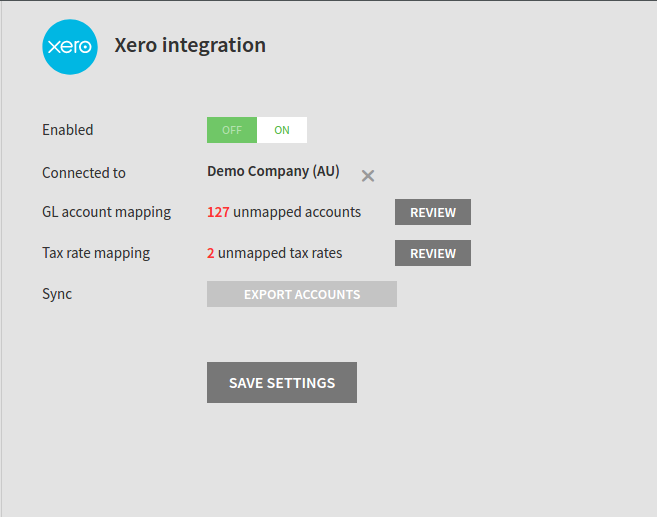
We have now successfully opened a connection between our Swim domain and Xero. Lets now move on to the next section where we start to map our Swim accounts on Xero.
Step Two: Mapping Swim's GL Accounts to Xero
