Zebra GX430T Setup Guide
Quick Reference List:
Note: The following guide only deals with the Zebra Stock Tag printer, which is the only brand of printer currently sold by TJS/Swim.
01. Drivers for Printer
02. Label Options
03. PDF Reader Options
04. Driver Settings
05. Stock Tag Template Setup
06. Final Alignment Touches & Printing
Driver Installation
Installing your printers driver software
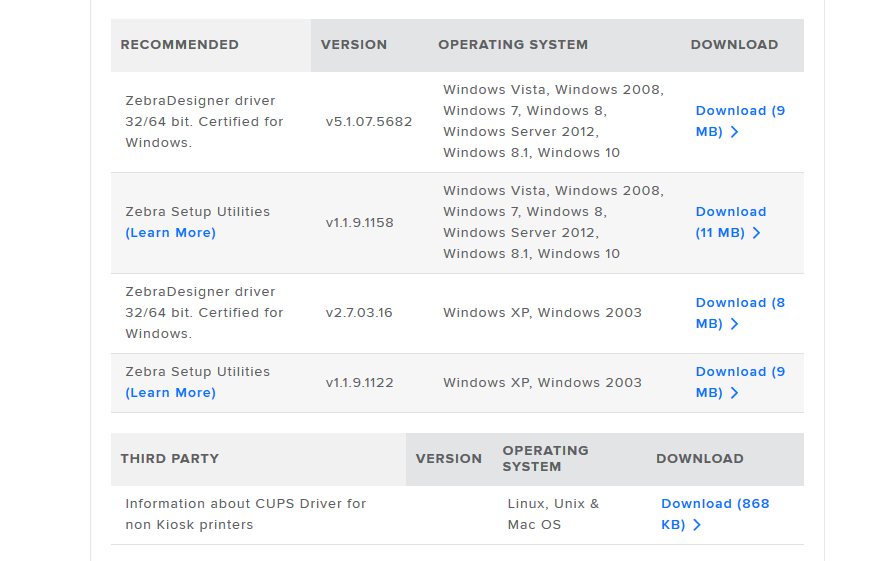
- Navigate to https://www.zebra.com/us/en/support-downloads.html

- Select your printers model from the drop down menu
- Scroll down and click on Drivers
- Under the Download Tab click the download link next to Zebra setup utilities

- Once the download has completed open the download package from the download arrow in the top right corner of Firefox.
- Click Start button from the installation window and tick the box accepting the licencing agreement presented to you on the following page
- Click next and leave the install directory as its default there is no need to change the settings on this page just click next again to continue.
- Ensure that under “Install this program for” the button it ticked next to “Anyone who uses this computer” click next to begin the installation on the following page.
- Once completed click finish to close the installation window.
- Restart your PC to apply the settings just installed.
Ensuring your printer is set up on the right settings is a vital part of making sure your printer is configured to function correctly. Your printer should be set on the following settings to give a clean and correct print each time.
Setting Zebra Printer Settings
- Open the Zebra Setup Utilities
- Click on your Zebra Printer to highlight it blue.

- Under Print Configuration click on Configure Printer Settings
- From the popup window enter in the width and height of your label you will be using with your Zebra printer ensure that you have the unit of measurement set to millimetres. The measurements for the Swim supplied TSR985W tag model is 78mm width by 25mm height. For the T510 or T550 the measurements are 78mm width by 15mm height. (Note if you have ordered labels directly from Swim you can find your measurements here.

- Click on the orientation drop down menu, select normal, then click next.
- Next you are presented with Speed and Darkness settings by default you shouldn’t have to change any settings here however ensure that you have the speed box set at 50.8 and the darkness set at 30 then click next.

- On the Media page set the print mode as Transfer and the media type as Web Sensing.

- Untick the box next to “Continue wizard with advance settings”
- Click Finish.
Labels
Labels for your printer can be ordered directly through the Swim support system to all our clients, we do provide clients with the following labels:
https://support.onswim.com/knowledgebase/281/02-Stock-tag-options.html
If you do decide to order your labels from another supplier you just need to check they will be compatible with your printer, however, and measurements of the labels will need to be taken. To get the correct measurements of your labels you simply need to measure the full width of the roll and the full height of the printable area whilst adding in the non-printable area. From there you half the non-printable are and add this together with the original height measurement. The width measurement is always the full width of an entire roll (including the left and right non-printable areas.)
As mentioned above we do provide all clients the option of ordering labels directly from us which we already provide the label specifications. The T985W labels use 78mm width by 25mm height. The T550 use 78mm width by 15mm height.
Stock Tag Templates
By default Swim will have the required stock tag templates listed for you to use, these templates will only work for you correctly if you have selected to order Stock Tag Labels directly from Swim Support. To ensure you have the correct template set to match your printer model, follow the below steps.
- Open the Utilities page of Swim from the home screen
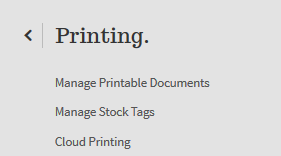
- Click Printing from the left side bar menu

- Click on Manage Stock Tags
- Under the Name Column find the template that has your Stock Labels model number within the name. e.g. "ZTAG_985W"
- Next to your printers template click Set Default, a confirmation notice will pop up to confirm the change.
If you are finding that the alignment is off be sure you have set the width and height correctly as per the 'Labels' step. If this is correct, you may need to find tune your Stock Tag Template, instructions for doing this can be found here: https://support.onswim.com/knowledgebase/216/How-to-edit-stock-tags.html
(You only need to 'Edit' the already existing tag template on your system, you do not need to create a brand new one)
This may require some trial and error, but you will certainly get it right eventually. For example, if the information is printing too far to the right on your tags, then you can drag the fields over on the template to the left, and then click 'Save' on the template. Now print a NEW tag and you should see that the information slides over accordingly.
Efficiently Printing Stock Tags:
To learn how to most efficiently print out stock tags for invoices or ranges of stock, please see the following guide: https://support.onswim.com/knowledgebase/570/How-to-effeciently-print-stock-tags.html
Common Troubleshooting Steps
Red Light Error
There are only a few common errors than can arise from the GX430t printer the most frequently occurring is called the 'Red Light" error. This error is indicated by a red flashing light display on the printer.
The cause of the error is normally an issue with how the media has been installed, check the following:
- The cause of the error is normally an issue with how the media has been installed, check the following:
- First, always turn the printer off completely and then check the below
- Check that the labels used are not seated correctly in their label holder.
- Check that the ribbon is not upside seated the wrong way around. The ribbon has 2 sides, a shiny side and a dull side, ensure the dull side if the side that will touch the tags when the lid is closed.
- Check that the ribbon is seated firmly in the ribbon holder. We generally recommend taking the ribbon out completely, closing the lid, opening the lid again and then placing the ribbon carefully back in its holder, using some force to ensure it is tightly seated.
Sensor incorrectly aligned
The sensor in your printer may from time become unaligned and give off an incorrect printout, to correct this issue a reset or recalibration may need to occur.
To reset the printers hardware settings to factory defaults press and hold down the feed button on your printer, this is generally the green or grey coloured button depending on your model. Whilst holding down the feed button your printer will flash a sequence of lights, it will flash in groups, 1 flash, then 2 more flashes, then 3 more flashes, then 4 more flashes and finally 5 flashes. In this case continue holding down the button until the printers light has flashed 4 times in a row and let go immediately on the fourth light sequence.
If resetting your printer to its factory defaults did not correct your alignment issue then a recalibration is required:
To recalibrate your printer press and hold down the feed button on your printer, this is generally the green or grey coloured button depending on your model. Whilst holding down the feed button your printer will flash a sequence of lights, in this case continue holding down the button until the printers light has flashed a total of 5 times and let go immediately on the fifth light sequence.
Your printer has now been reset or recalibrated and should be aligned and printing correctly.
Printer is not detected by my PC
If your printer is no longer being detected by your PC there are a few trouble shooting steps to try resolving this issue:
- Ensure that the printer is plugged in firmly into its USB port, unplugging and plugging the cable in again is commonly a quick fix.
- Reboot your printer by turning it off the power switch at the back of the printer and waiting 10 seconds before turning on again.
- Try plugging the printer into a different usb port on your PC, over time your computers USB port may fail and can cause the printer to not be detected correctly.
- Replace the USB printer cable with a new one, the USB cable can deteriorate in quality and stop the computer from detecting your printer.
Printer is printing faded or incorrectly
If your printer is printing incorrectly or is showing signs of fading ensure the following have all be completed correctly.
Ensure the ribbon inside the printer is firmly in place:
- Turn off your printer and remove the ribbon entirely.
- Turn the printer back on without the ribbon inside and wait for the printer to flash a red light.
- Once more turn the printer off.
- Place the ribbon back inside the printer taking special care to ensure the ribbons cardboard is lining up with the notches in the ribbon holder.

