Initial Setup
Because the StarMicronics TSP650-2 WebPrint is a cloud based printer, the printer will require an Ethernet cable running from the printer to your router/modem.
Downloading the StarMicronics TSP650-2 WebPrint Driver
Download the StarMicronics driver by clicking the link below:
- Download Ethernet driver here!
- After you have downloaded the file, open it up the download and run the installation.
- You will need to restart your Mac computer for these drivers to take effect.
Adding your Ethernet printer to the Computer
In order to print receipts in SWIM, we will need to connect to the printer on your Mac computer
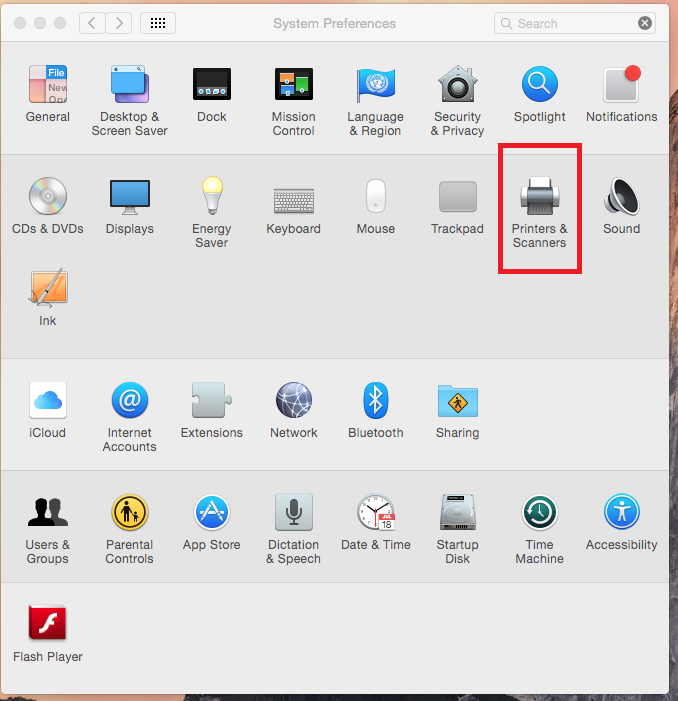
- Open up the system preferences on your Mac and click on the "Printers and Scanners", this is usually found in the list of programs on your dock. If not find it in the applications folder.
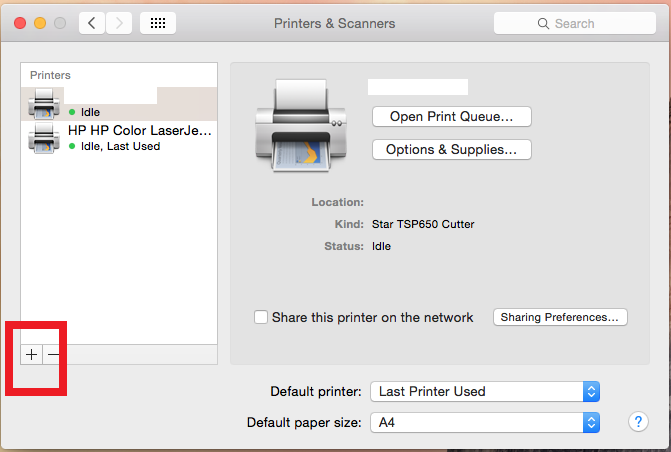
- Here you will see a list of printers available. Click on the plus icon "+" to add a new printer.
- To add your new Web Printer, you need to click on the IP tab, as we will be connecting to the printer over the network. If you do not know the I.P address of your starmicronics printer yet. Please check below to manually obtain your printers IP address by clicking here.
- Enter your ip address in the top box as shown in the image below. Leave protocol as "Line Printer Daemon- LPD" , for the drop box next to the label "Use". You need to select "Select Software.." as show below.
You will be shown a list of printer drivers. You need to find and select the "Star TSP650 Cutter" from the list of drivers. Now click add. You will now be able to find this printer when printer regular documents.
Note: The list of drivers may not appear if this is the first time you are setting up and did not restart your computer after installing the drivers as mentioned at the start of this article.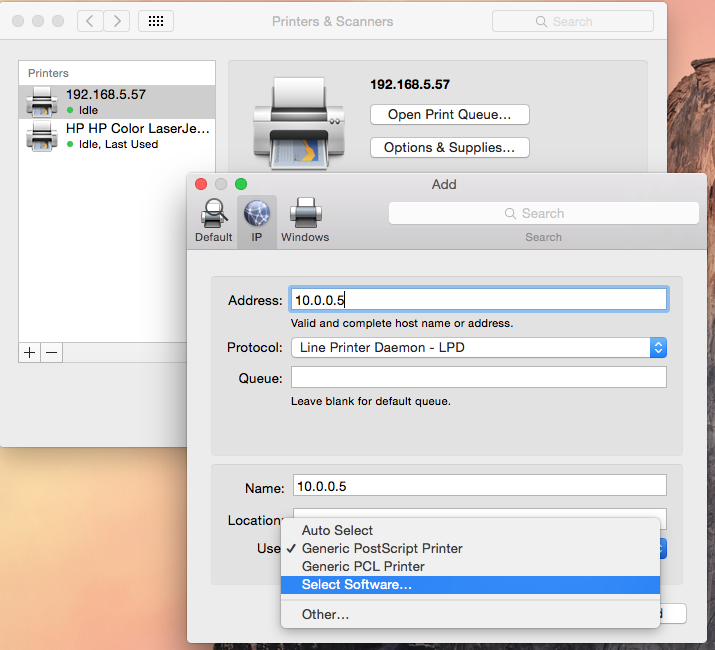
Inputting your printers IP address into SWIM
Having recorded your printers IP address in the setup, you will now need to setup cloud printing in SWIM.
- Open up the SWIM utilities. Go to "Printing", then click on "Cloud Printing".
- Enter your printers IP address into the box and click save.
Manually obtaining your printers IP address
If you forgot to record the printers IP address during the driver installation, you can manually obtain the address by following these steps.
- Turn the printer off using the power switch on the side of the Unit
- Hold the feed button and turn the print back on. Continue to hold the feed button
- Hold the feed button for eight seconds, during this time the printer will print out two documents. After you release the feed button, the printer will print out a third document.
- At the bottom of the third printout, you will be able to read the "IP Address"
Enabling Mixed-Content Blocking in Firefox
To allow Firefox to use the webprinter, you will have to allow mixed-content within the browser. To do this follow the steps below:
- Open up a new tab within Firefox.
- Type into the address bar: about:config and click enter.
- A warning prompt might appear confirming if you are sure, click yes.
- At the top of the list there is a search bar, copy and paste the following: security.mixed_content.block_active_content
- This option should now be visible in the list, right click on it and select Toggle until it's value is false.
Troubleshooting the printer
Error Message - "Printer Error": If you receive this, there is a high chance that the IP address of your WebPrinter is incorrect.
- For the StarMicronics TSP650-2 WebPrint, please read the section above labelled Manually obtaining your printers I.P address.
