If you are setting up a TSC 343 Stock-Tag printer for the first time there is a few things you to need to do to get started.
The first requirement in setting up your TSC printer is to ensure your web browser printing settings are correct.
This can be achieved by reading the following knowledge base article.
Important Note: Stock tags will only print correctly if you are using FireFox.
1. You need to have the printer turned on. There is a power switch at the back of the printer for turning it off and on.
2. Once you have got the printer turned on you now need to load the stock-tags rolls and thermal rolls (note: Usually you will receive the printer already loaded from us.
Installing the driver.
Setting up the TSC on a Windows computer is straightforward. The first step is to download the printer driver
To download the latest driver CLICK HERE!
If this link does not work, please follow the steps below
- Visit http://tscprinters.com/, once on the company website, under the "Service & Support" tab click on "downloads".
- In the list of options that appear, select "Driver & Software" and select the latest driver under the "Windows driver" option.
- Download and run the the program to install the driver. If you have your TSC 343-C already plugged into the Windows Computer then the Driver will detect this and you can simply select it from the list of printers.
Calibrating the TSC printer
Once the printer is set-up on your platform of choice (Windows or SWIM) you can try printing from it. If stock-tags are being printed but nothing is printing out on the tags then you will need to calibrate and align the printer. Doing this is very straight forward and takes little time. First, you need to turn the printer off. You will have noticed, by now, the green FEED button on the top of the printer. This button feeds blank tags through should any tags get stuck, but it also is used to calibrate the printer.
While the printer is OFF, hold down the FEED button, do not release this button yet. Without releasing the button turn the printer back on and you will notice the LED light will start flashing or changing colour. Each sequence of flashes relates to a certain calibration. To skip these sequences just keep holding down the button until it goes solid green.
In order to calibrate the different settings of the printer, you need to go through each of the different sequences. To select the sequence all you need to do is take your finger off the button when it flashes twice on the desired colour pattern.
The order of the flashes is as follows:
SEQUENCE 1. Amber (Solid)
SEQUENCE 2. Red (5 flashes)
SEQUENCE 3. Amber (5 flashes)
SEQUENCE 4. Green (5 flashes)
SEQUENCE 5. Green/Amber (5 flashes)
SEQUENCE 6. Red/Amber (5 flashes)
SEQUENCE 7. Solid green
We will use this list as a reference. When you get to the correlating sequence take your finger OFF the FEED button after 3 flashes of the correlating colour/s.
Note: After each step you must turn the printer off again and hold feed whilst you turn it back on.
- First you need to initialise the printer, so commence SEQUENCE 4 (take your finger off when flashing green).
- Now you need to align the printer, to do this commence SEQUENCE 6. (take your finger off when flashing red & amber)
- Now you need to Calibrate the sensors, so commence SEQUENCE 2 (take your finger off when flashing red)
- and then SEQUENCE 5 straight after. (take your finger off when flashing green & amber)
- Finally, you can now do a test page print. So commence SEQUENCE 3 (take your finger off when flashing amber)
After you have done these 4 steps, turn your printer off and on again. Your new printer should be fully set-up and ready to print from SWIM.
Changing your driver settings (Windows)
- Open the control panel from your desktop. (accessible through the start menu)
- Once control panel is open, click on 'devices and printers'.
- Find your recently installed TSC printer in the list, right click on it's name/icon and choose 'printing preferences'.

- Under the 'Page setup' tab. In the 'Stock" field, select "New.." to create a custom printer setting.
- Name your new setting something relevant (eg-SwimTags) and correct the label width and size based on your paper (eg- Width 78.0mm and Height 25.0mm) and click 'OK'
- Make sure the Orientation is set to 'Portrait', then click 'Apply'.
Creating a new label template in SWIM
Once your printer has been installed and the driver settings adjusted. You can now create your stock tags.
Now that you have SWIM open. Follow these simple steps to create your stock tags.
- Move your mouse (or finger on a touch screen) over the three lines on the top right side of the screen, next to the 'reports' icon.
- Click on 'Utilities'.
- Click on 'Printing', then 'Manage Stock Tags'.
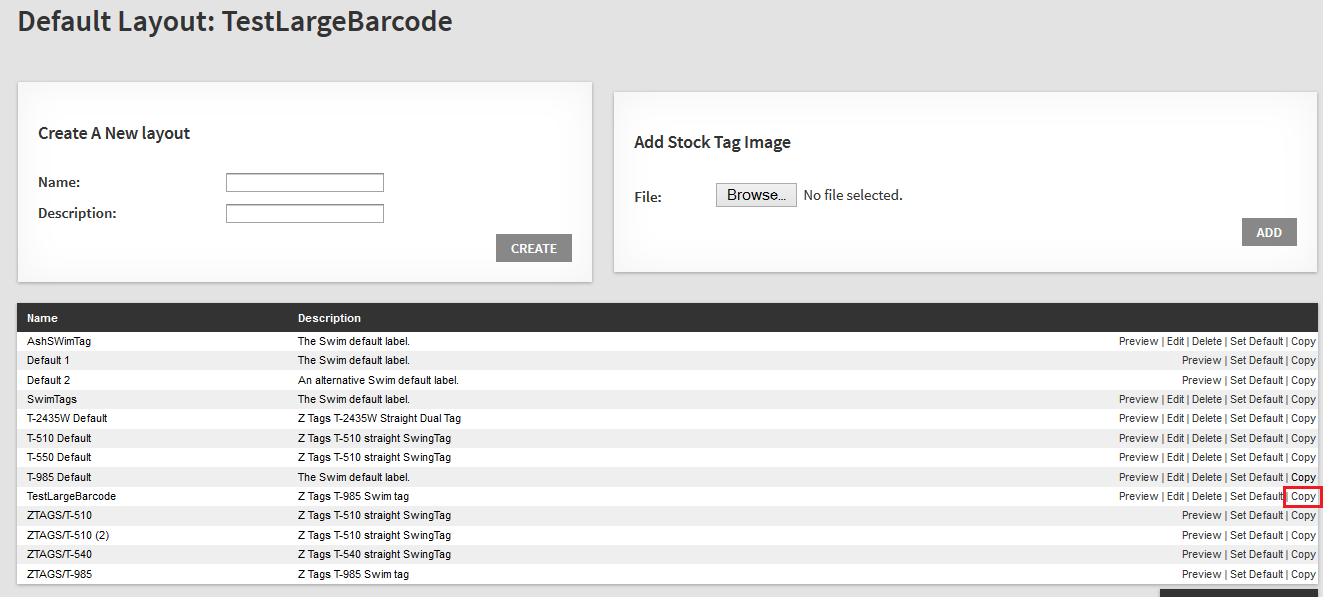
- Next you need to create a label based on some provided printer defaults. For the TTP-343C, find the 'T-985 Default' layout in the list displayed and select the option "Copy" on the far right.
- Give this new stocktag a name that is meaningful to you. eg-'SwimTags'.
- Find your new stock tag and select 'Edit'. Once the new page has opened up, the first step will be to click on 'Properties' and change the size of the tag to the same dimensions you entered into the driver settings eg-(78mm by 25mm).
- Click 'OK'
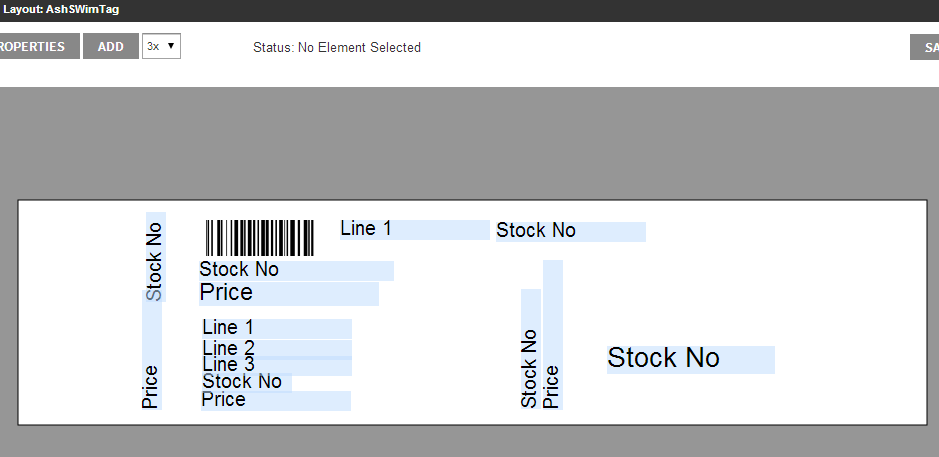
- Now that you are in the 'Editing Layout' window. You can drag and drop the different elements of your desired stock tag layout.
Example-- template editing window -- Drag and drop elements to suit your desired layout
You can test your layout by clicking 'Preview/Print' in the bottom right of the screen.
Note: On occasion printing from the stock tag editing window might produce a tag slightly off centre.. Make sure to completely test your layout by generating and printing a stock tag.
