Installing your Star Micronics TSP 650 Printer
The following guide provides a step by step instructions of how to get your receipt printer working correctly please ensure you follow these steps in order before plugging in your Star Micronics Printer.
Checking Windows Version
- Right click the Windows Icon in the bottom left corner of the screen.
- Select Control Panel from the menu
- From the Control Panel window click on System
- Next to the System type your version will be displayed as either 32bit of 64bit please take note of which version you have installed.
Downloading Driver Software
Installing Driver Software
Once the driver software has finished downloading:
- Open the completed downloads list by clicking on the downwards pointing arrow in the top right hand corner of Firefox.
- Click on the driver software you just downloaded.
- From the top menu bar select extract files.
- Once extracted open the Setup folder and open the installation software by clicking on “Setup.exe”
- Follow the installation prompts until you reach the finish screen, there are not settings or options you need to change during the installation process.
- Once the installation is complete restart your computer.
Configuring your printer for Swim (USB)
*** If you are using an ETHERNET connection please skip this section and use the section for Swim (Ethernet) ***
- Plug your printer into your computers USB port.
- Click the windows icon and type in "star" select the Print Utility Star Print program.
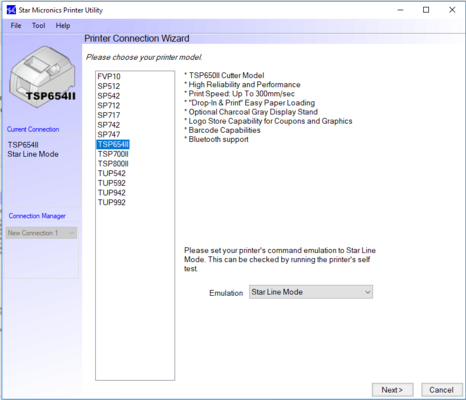
- From the Printer Connection Wizard select TSP654II
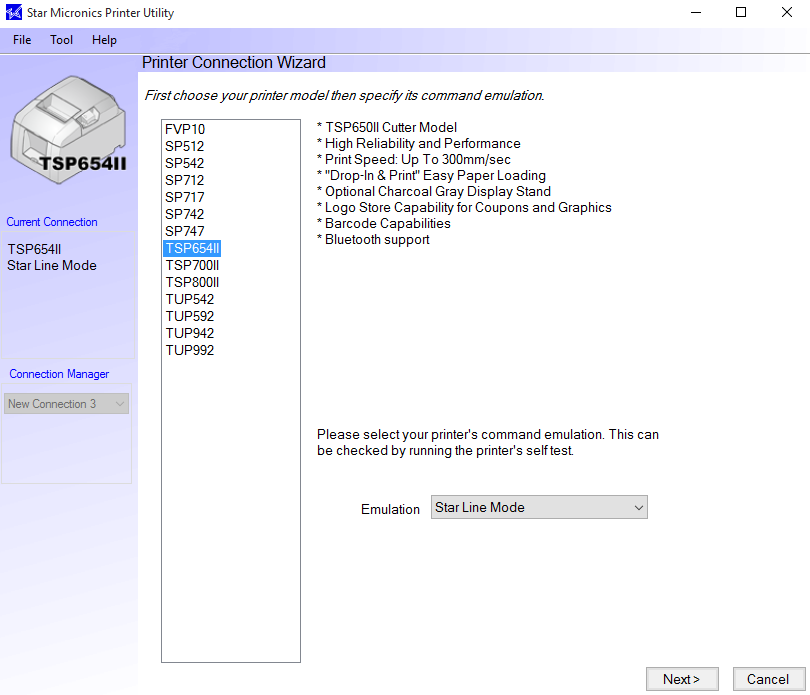
- Under the Emulation drop down box select Star Line Mode
- Click Next
- Select the connection type USB
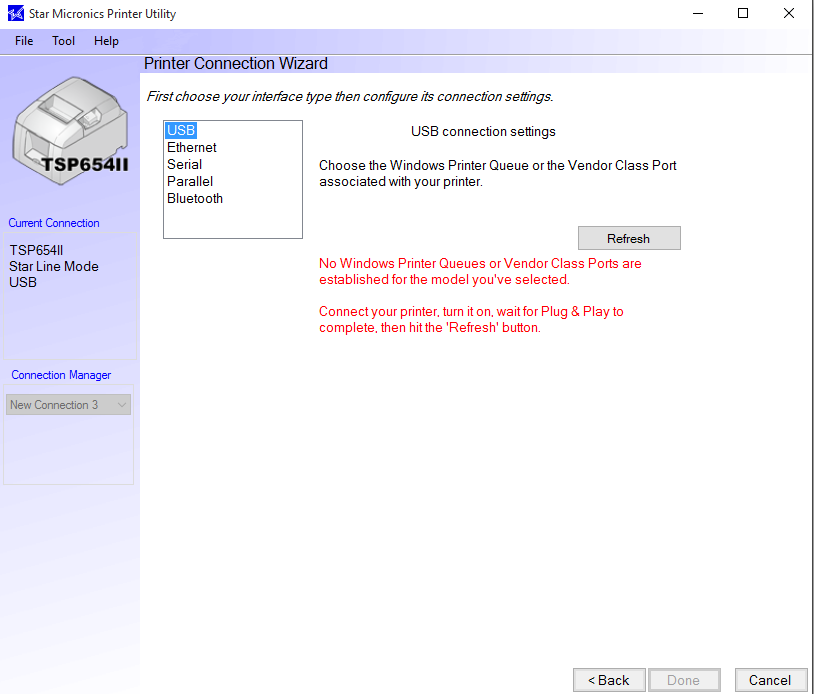
- Once the utlity has found your printer click Done.
- A popup window will appear asking you to name your printer the default is an acceptable name however you may personalise it as you wish.
- Click okay on the popup window.

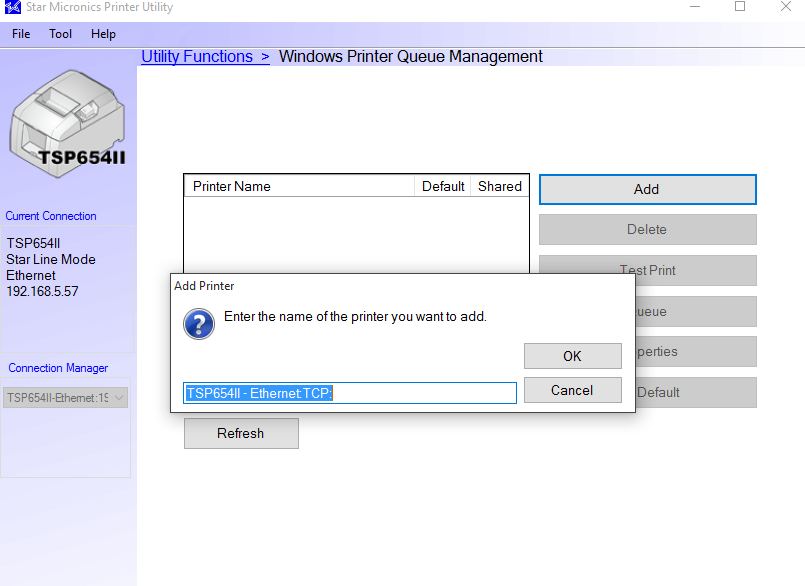
- Click on Windows Printer Queue Management.
- Click Add then click OK
- Select your printers name from the list and click on Test print to confirm that your printer is functioning correctly.
- Select your printers name again and click on Properties
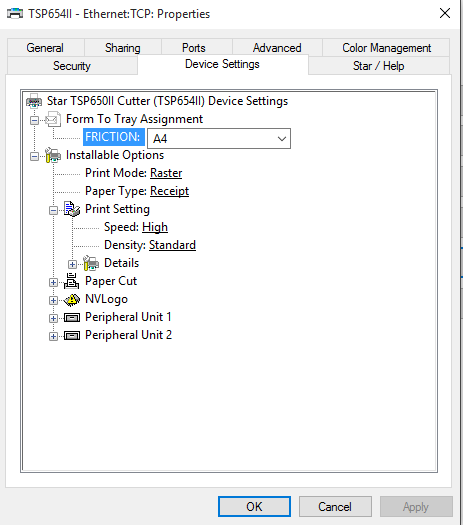
- Click on the Device Settings tab and enter in the following settings
- Friction: 72mm x receipt
- Print Mode: Raster
- Paper type: Receipt
- Page Cut Type: Partial cut
- Document Cut type: Partial Cut
- Printer Speed: high
- Print Density: +3
15. From the same window select the general tab and click on preferences (note this is down the bottom of the window)
16. Click Advanced and ensure the following settings are in place:
- Paper Size: 72mm x Receipt
- Colour Printing Mode: 8 Colour (Halftone)
Configuring printer to function with a cash drawer
If you have a cash drawer you would like to function with your printer ensure the settings below are in place otherwise your printer will now be installed and ready to print.
- Peripheral Unit Type: Cash Drawer
- Peripheral Unit 1: Document bottom
Configuring your printer for Swim (Ethernet)
- Using an Ethernet cable (internet cable), plug your printer into an available ethernet port on your router. Your router is where all your computers are plugged into to receive internet, the Printer needs to go into this same router in its own port.
- Click the windows icon and type in "star" select the Print Utility Star Print program.
- From the Printer Connection Wizard select TSP654II
- Under the Emulation drop down box select Star Line Mode
- Click Next
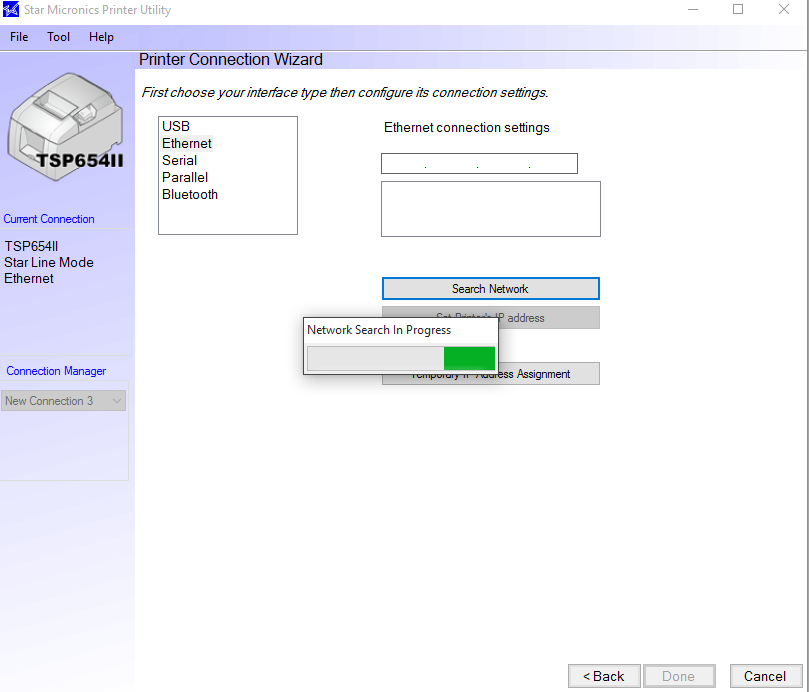
- Select the connection type select ethernet

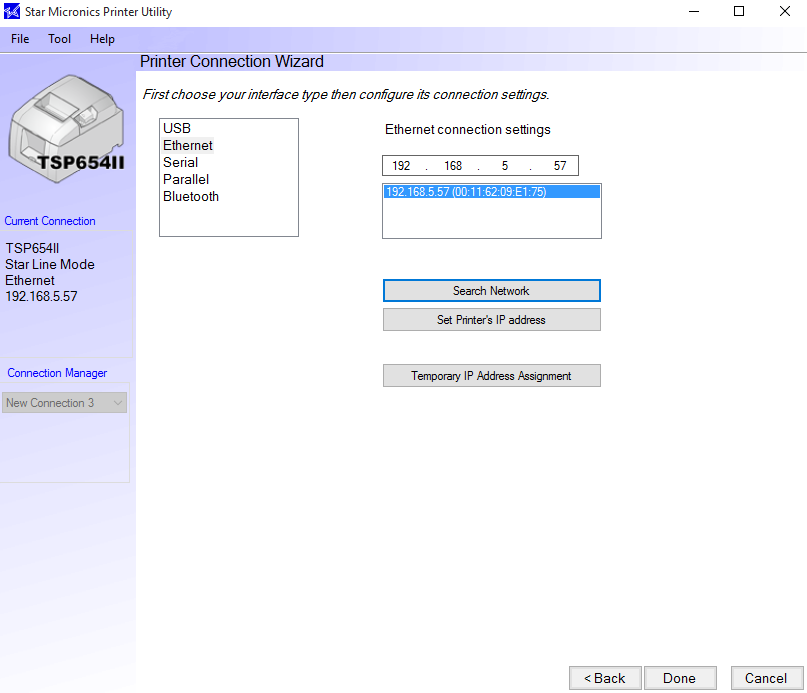
- Click on Search network
- Once the utility has found your printer click on Set Printers IP Address
- A popup window will appear showing you the default username and password to access your printers web utlitisies page take note of the login details as these will be needed to continue. (By default the username will be root and the password will be public.)
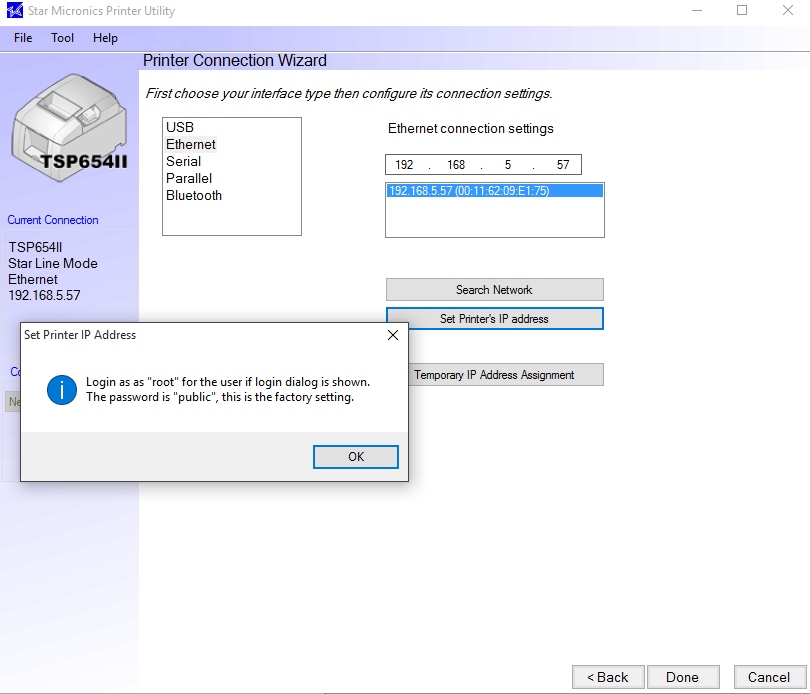
- Click okay from the popup window to continue.
- Type in the login details from the previous step and login.
- From the left side bar click on IP Parameters
- Ensure that the static box is ticked and next to Ip address change the last 2 digits of the numbers to 99. e.g. XXX.XXX.X.99

- Click Submit to apply the changes.
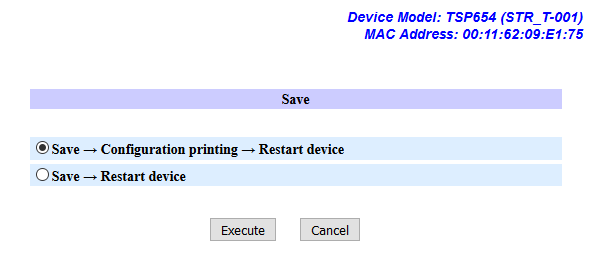
- From the side menu click on Save then click on Execute. (Your printer will now restart and print out a network details receipt.
- Open up the Star Print Utilities tool again and click Done.
- A popup window will appear asking you to name your printer the default is an acceptable name however you may personalise it as you wish.
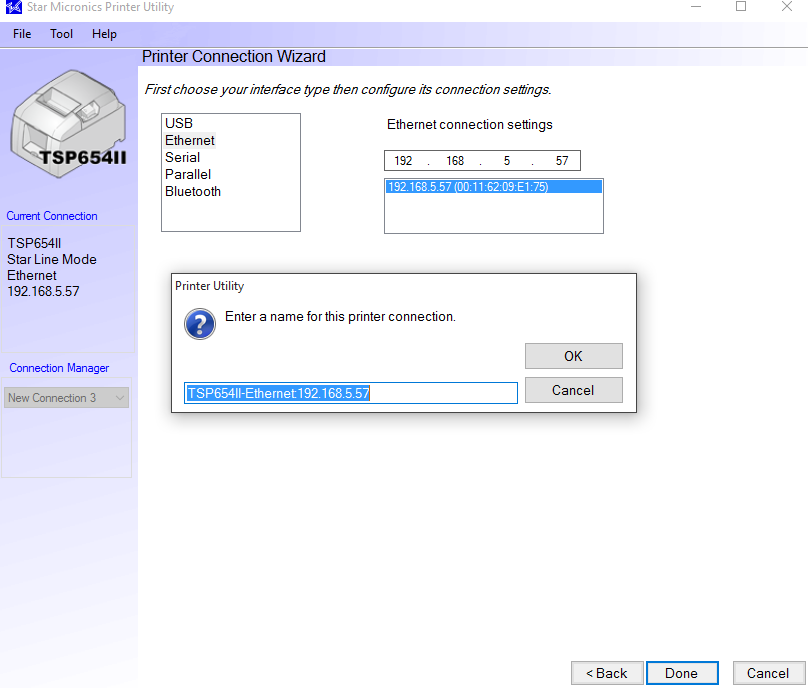
- Click okay on the popup window.
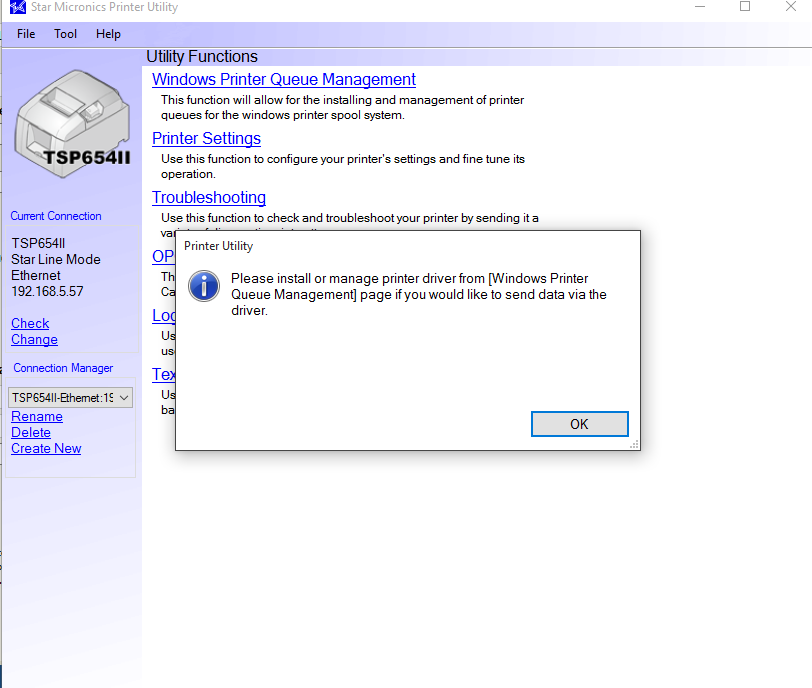
- Click on Windows Printer Queue Management.
- Click Add then click OK
- Select your printers name from the list and click on Test print to confirm that your printer is functioning correctly.
- Select your printers name again and click on Properties
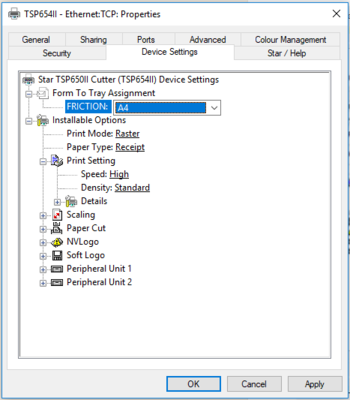
- Click on the Device Settings tab and enter in the following settings
- Friction: 72mm x receipt
- Print Mode: Raster
- Paper type: Receipt
- Page Cut Type: Partial cut
- Document Cut type: Partial Cut
- Printer Speed: high
- Print Density: +3
24. From the same window select the general tab and click on preferences (note this is down the bottom of the window)
25. Click Advanced and ensure the following settings are in place:
- Paper Size: 72mm x Receipt
- Colour Printing Mode: 8 Colour (Halftone)
Configuring printer to fuction with a cash drawer
If you have a cash drawer you would like to function with your printer ensure the settings below are in place otherwise your printer will now be installed and ready to print.
- Peripheral Unit Type: Cash Drawer
- Peripheral Unit 1: Document bottom
