Software Setup
The first steps to correctly setup your Zebra printer is to install the necessary software required both Firefox and an appropriate PDF viewer such as Preview or Adobe Acrobat are needed to make your printer function correctly.
Installing Firefox
- Navigate to https://download.mozilla.org/?product=firefox-42.0-SSL&os=osx&lang=en-US
- Once the software has downloaded open the package and wait for it to verify the software.

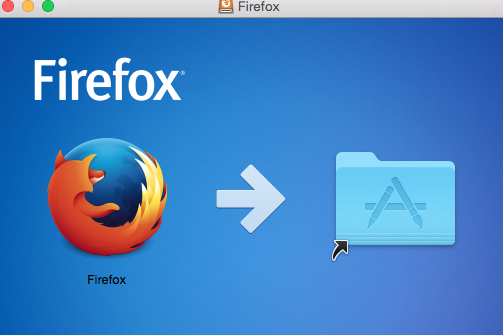
- Click and drag the Firefox icon to the applications folder to the right from within the software package to copy Firefox onto your Mac.
Printer Setup
To begin with plug in your printer to both the computer you are wanting to print from and the power outlet. Aligning your printer is the best way to make sure your printer is going to print correctly for you, you can align your printer by utilising the “4 flash sequence.”
To enable the flash sequence hold down the feed button on your printer (this is typically the button on the front of the printer) until the light starts to flash.
You will need to continue to hold down the feed button a total of 11 times, the printer will flash in short bursts e.g. Burst of 1 flash, 2 flashes, 3 flashes. Cease holding the feed button immediately after the 4 set of flashes, the printer will flash 4 times in this sequence.
Installing Driver Software (CUPS)
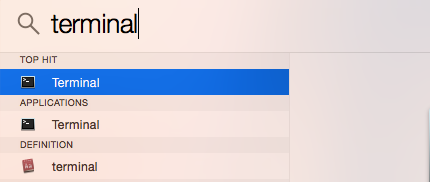
- Open the Terminal App by clicking the search icon in the top right corner of your macs desktop and typing in terminal and pressing enter.
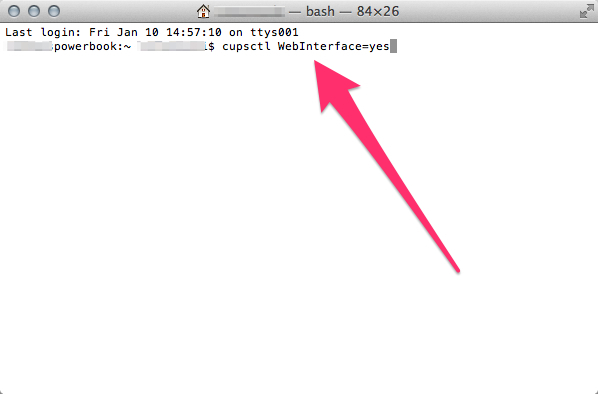
- Once the terminal window is open type in cupsctl WebInterface=yes and hit enter (note that the command must be typed exactly how it is displayed here for it to work.
- Close Terminal as it is no longer needed.
Driver Setup
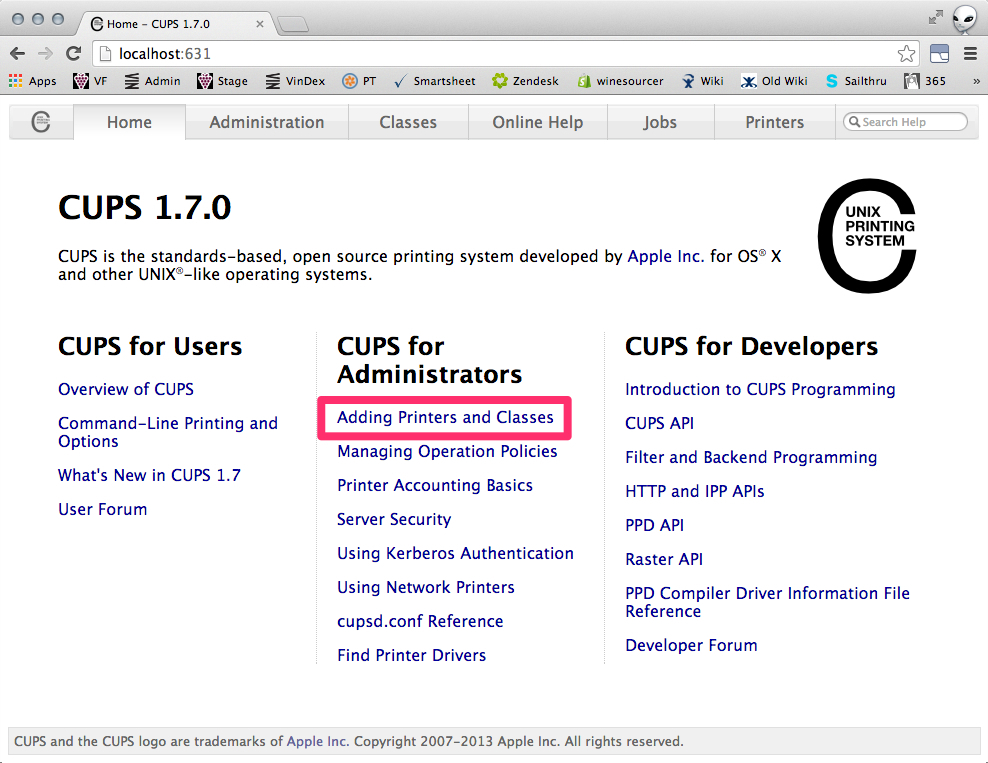
- Open up your Firefox web browser and in the address bar enter http://localhost:631 to access the CUPS configuration web page.
- From the Home page select “Adding Printers and Classes” (If you are prompted for a username and password the login details are the same as you would use to login into your Mac.)
- Under Printers, select “Add Printer”
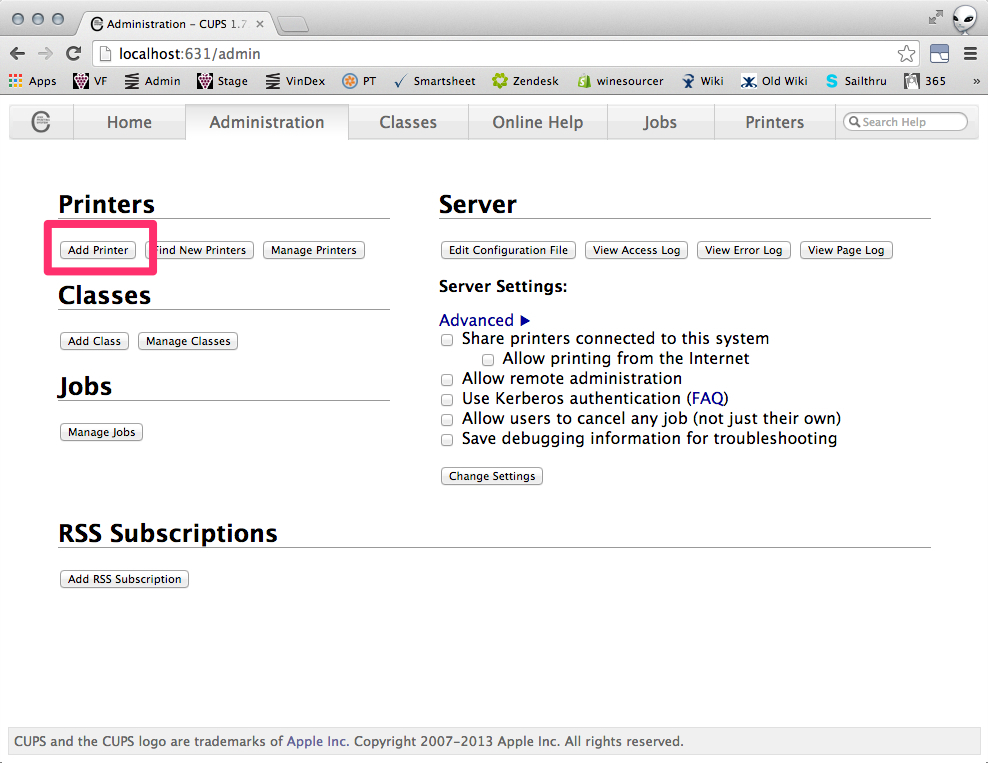
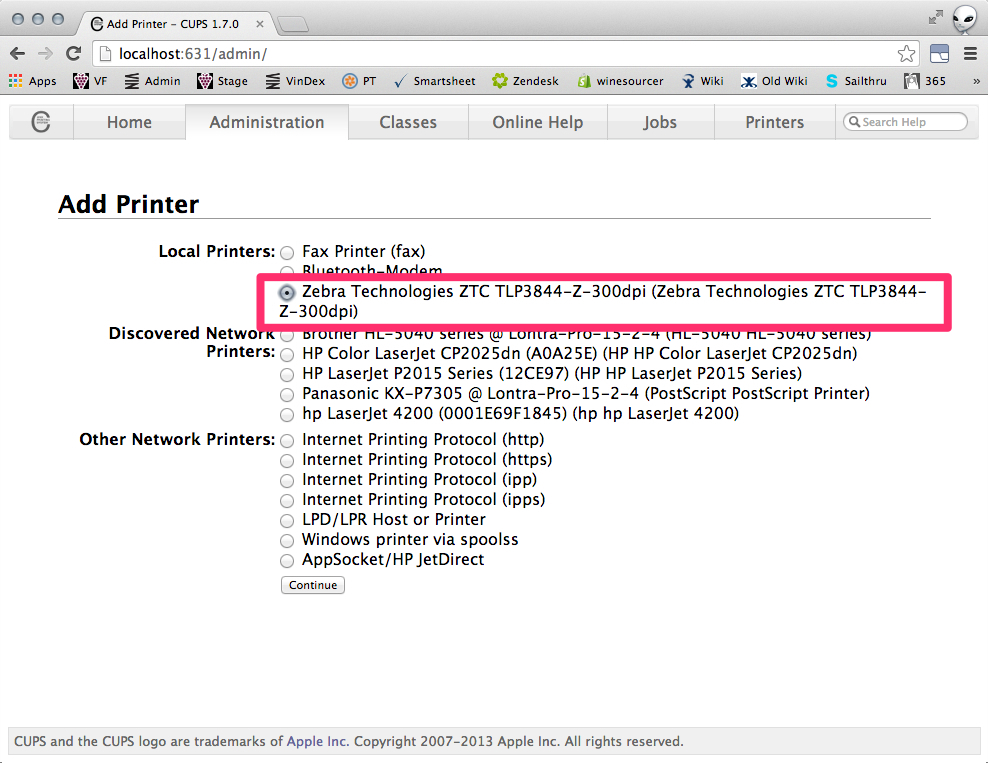
- CUPS will now search for your printer, once completed the page will display all located printers and ports into categories
- You will see your Zebra model in the list of printer categories simply select your model and click “Add Printer”
- You now need to add a name, location and description for your printer these are typically personal and can be named whatever you wish however please avoid using symbols and spaces.
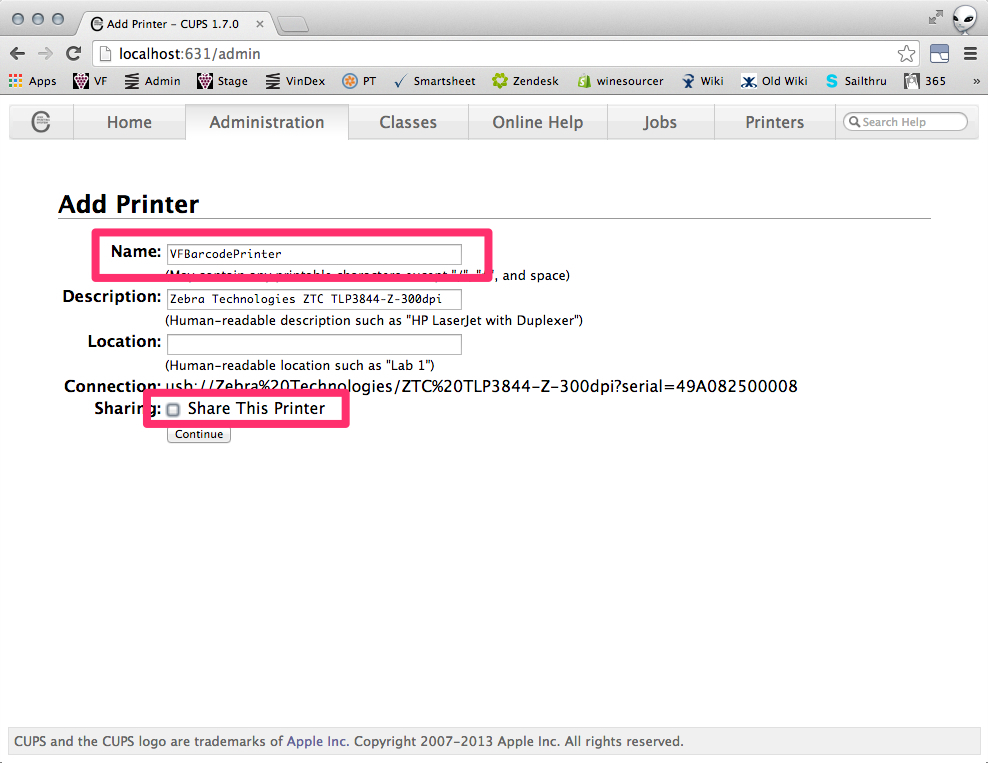
- Next ensure that you tick “Share your printer”
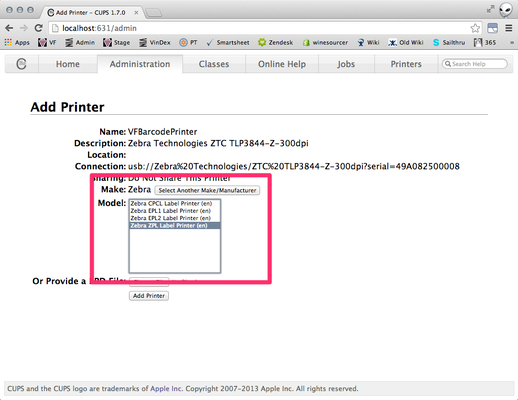
- Select the make of the printer as “Zebra” then select “Zebra ZPL Label Printer (en) as the model and click “Add Printer”
Printer Settings
You will now need to setup the driver settings on your Mac Computer again this is done via the CUPS configuration web page
- Open Firefox and in the address bar type in http://localhost:631 then hit enter.
- Click on Printer in the top right corner
- You will now see your model printer listed “GX430T” click on it.
- You are now presented with the settings page for your printer, click on the dropdown box that says “Administration” and then click “Set default Options.”
- Now you will be taken to another settings page for the printer, from the “Media Size Box” change it to 1.25x0.25.
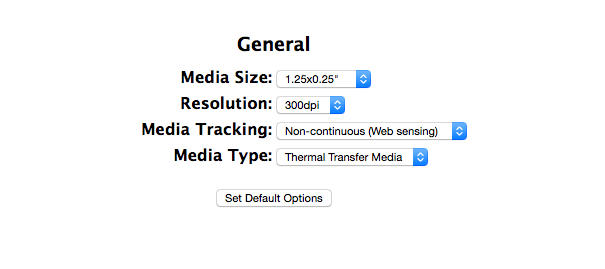
- Change the “Resolution” to 300dpi from the same page.
- Finally change the Media tracking to “Non-continuous Web Sensing and change Media type to “thermal transfer media.
- Next click on the Printer Settings link (this link will be highlighted in blue)
- Within the printer settings page change the Darkness to 30 and ensure all other options are set to Printer Default.
- To finalise the settings click “Set default Options”

