Steps to Configure a Star Micronics Printer on macOS.
Introduction
This application note provides instructions for installing a Star Ethernet (LAN) or Wi-Fi printer on macOS via the CUPS driver.
Supported Printers: All Star Desktop Ethernet (LAN) and Wi-Fi Printers
Supported Interfaces: Ethernet (LAN), Wi-Fi
Supported Environments: macOS
Before you begin
Important! New installations require two steps: 1) Install the CUPS driver and 2) Add the printer to macOS. These two separate steps are explained below.
Note: If you have already installed the driver, skip to Section #2.
1. Install the CUPS Driver
The most current version of the CUPS driver can be found HERE
1. Click the link above and click “Download”. Select “I Agree” and click “Download”.

2. Locate the downloaded zip folder (commonly located in the Downloads folder). Open the zip folder.

3. Open the newly extracted folder and open the Driver folder. Run the .pkg file.


4. Click “Continue”.

5. Change the Install Location if necessary and click “Install”.

6. Log in with your macOS credentials and click “Install Software”.

7. The installer completes the installation.

8. After the installation is successful click “Close”.

Congratulations! You have successfully installed the CUPS driver on macOS.
Enable CUPS Web Interface
1. Open a web browser and type localhost:631 in the address bar. If accessing this page for the first time, the Web Interface will be disabled.

2. To Enable CUPS On the Mac device, go to Utilities and open “Terminal”.

3. In Terminal, type the following command and tap Enter:
cupsctl WebInterface=yes

4. Return to the browser and reload the page. The CUPS Web Interface will now be enabled.

Congratulations! You have successfully enabled the CUPS Web Interface on macOS.
2. Add the Printer to macOS
1. Determine the printer’s IP Address on the network. This can be found at the bottom of the printer’s self-test under Current IP Parameters Status. Use the steps in the following article to do so.
How to Perform a Hardware Self-Test on Star Printers

2. Open System Preferences and select “Printers and Scanners”.

3. Click the “+” to add a printer.

4. Click on the “IP” tab.


5. Enter the following:
Address: IP address of printer being set (Check in self-print)
Protocol: Line Printer Daemon – LPD
Queue: Any character string (Printer cannot be used if left blank)
Name: Any character string (The IP address is automatically input by default)

6. Click on “Use” menu and select “Select Software…”.

7. Search for “star” and select your printer model.
Note: Use the table below to identify the correct Model to select for your printer.


8. The printer is added.

9. To test, highlight the printer and click “Open Print Queue…”.

10. In the top menu bar select Printer and click “Print Test Page”.


Congratulations! You have successfully installed a Star LAN or Wi-Fi printer on macOS.
Alternative Option: Adding Printer via CUPS(Manual Configuration)
If the printer does not appear in the CUPS device list, you can manually configure it by adding the printer.
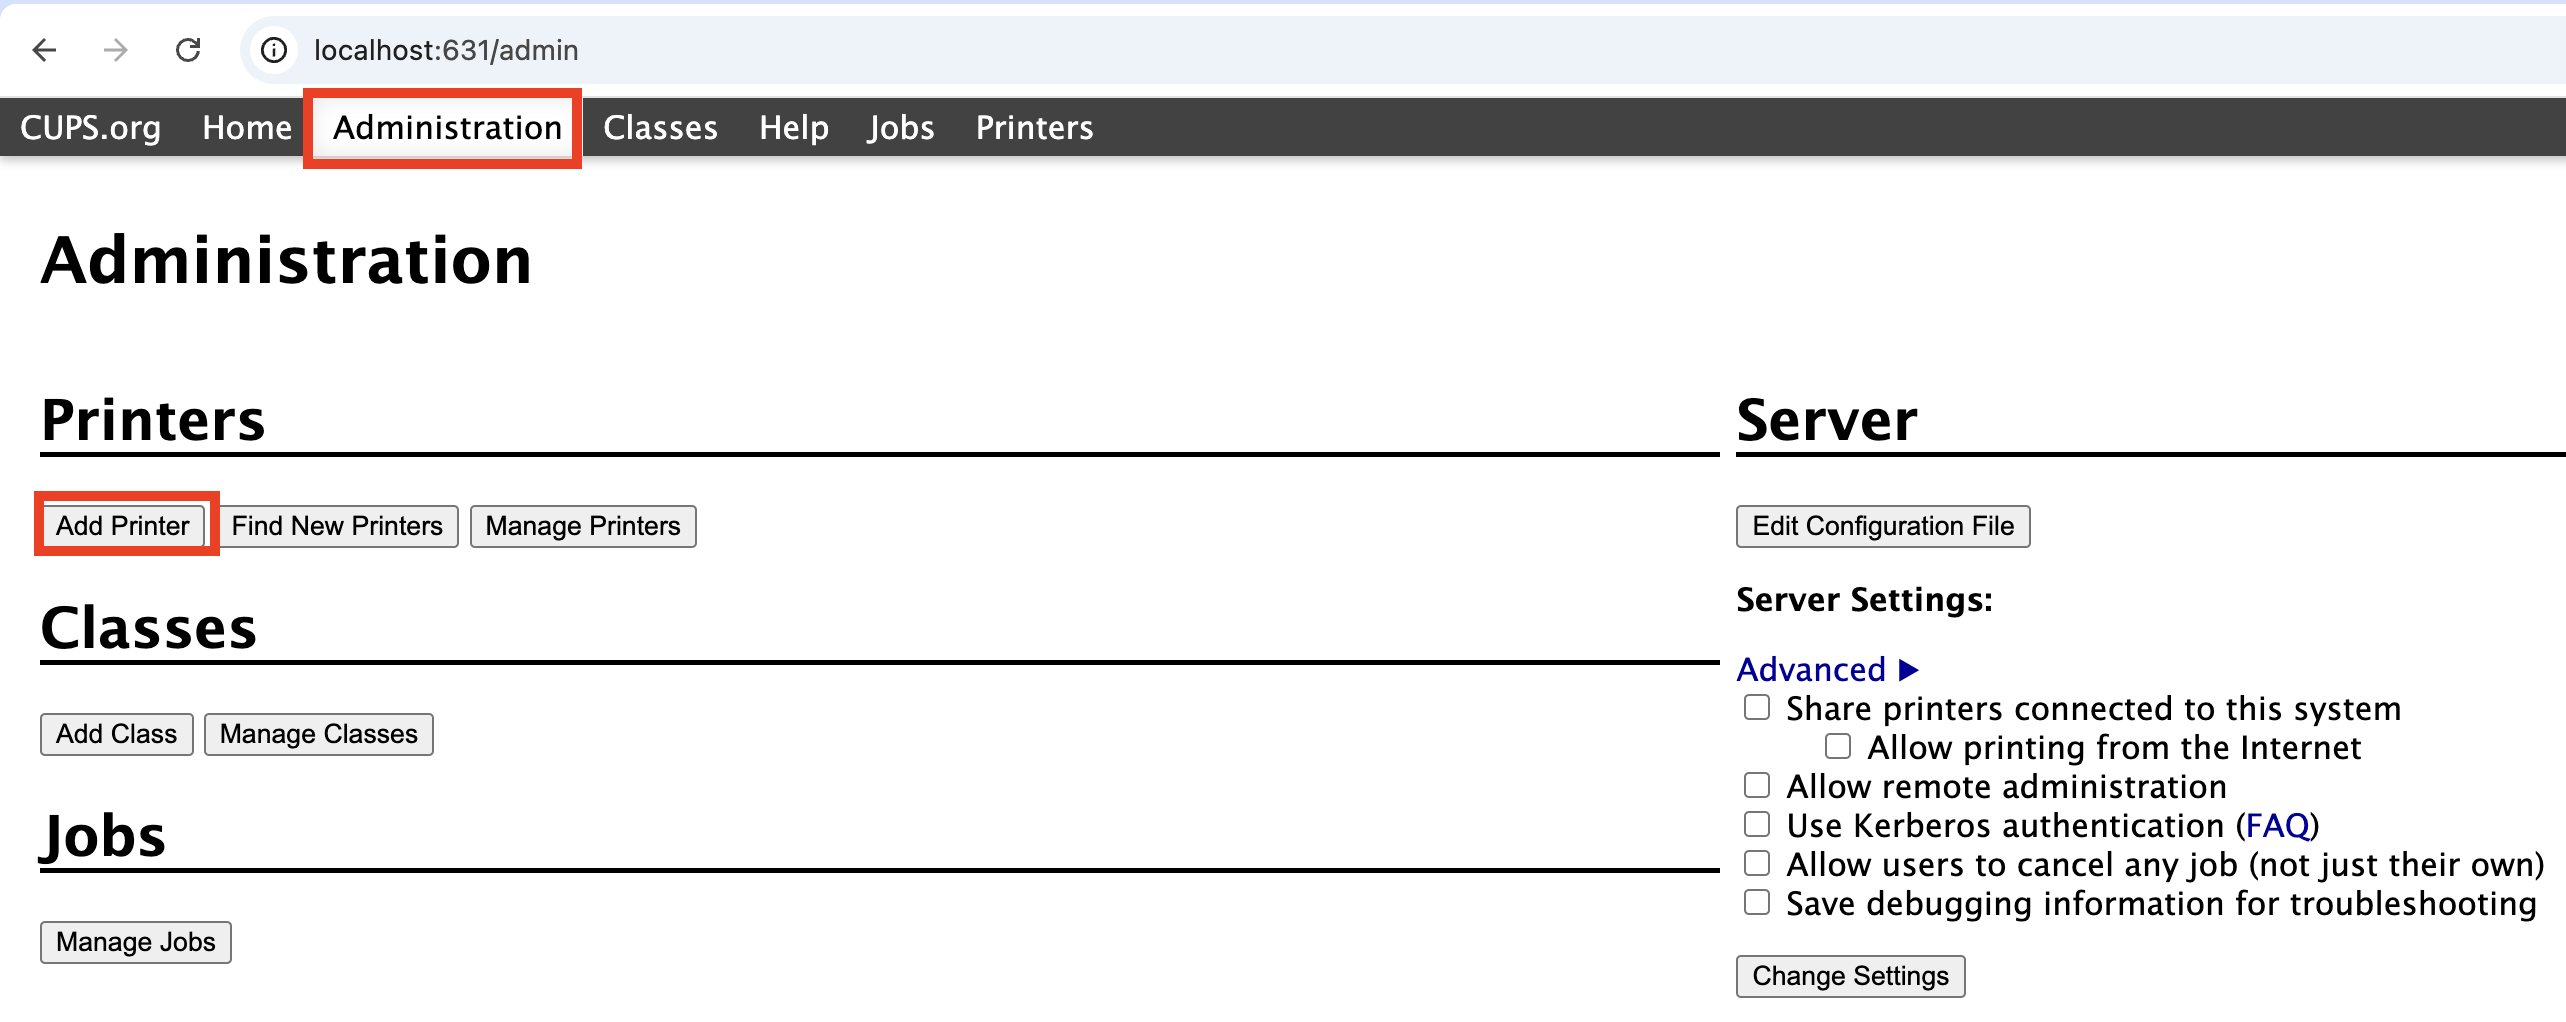
1. In CUPS, go to Administration > Add Printer.
2. Choose other network printer and from the option select 'LDP/LPR Host or Printer'.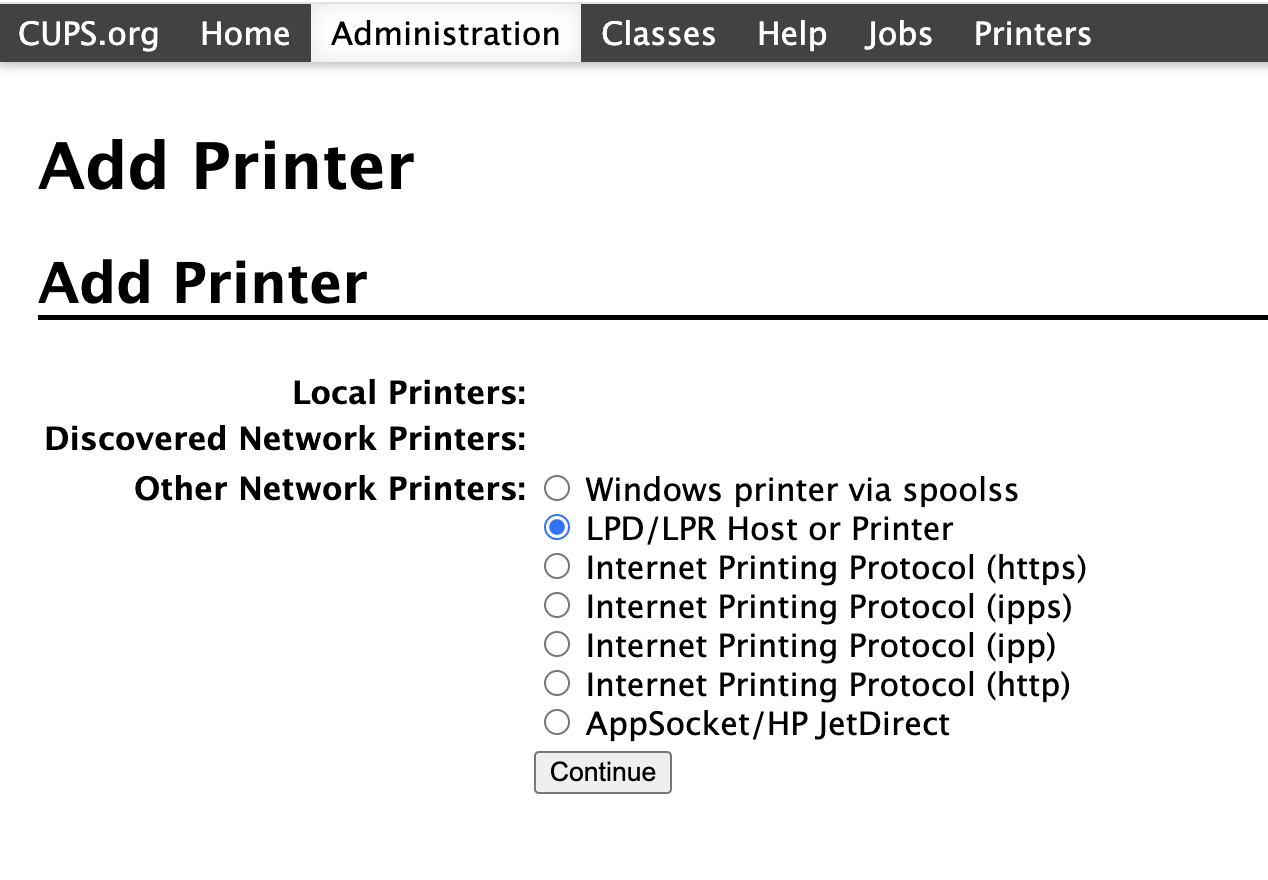
3. In the LDP Connection type in: "lpd:Http://printer-IP/".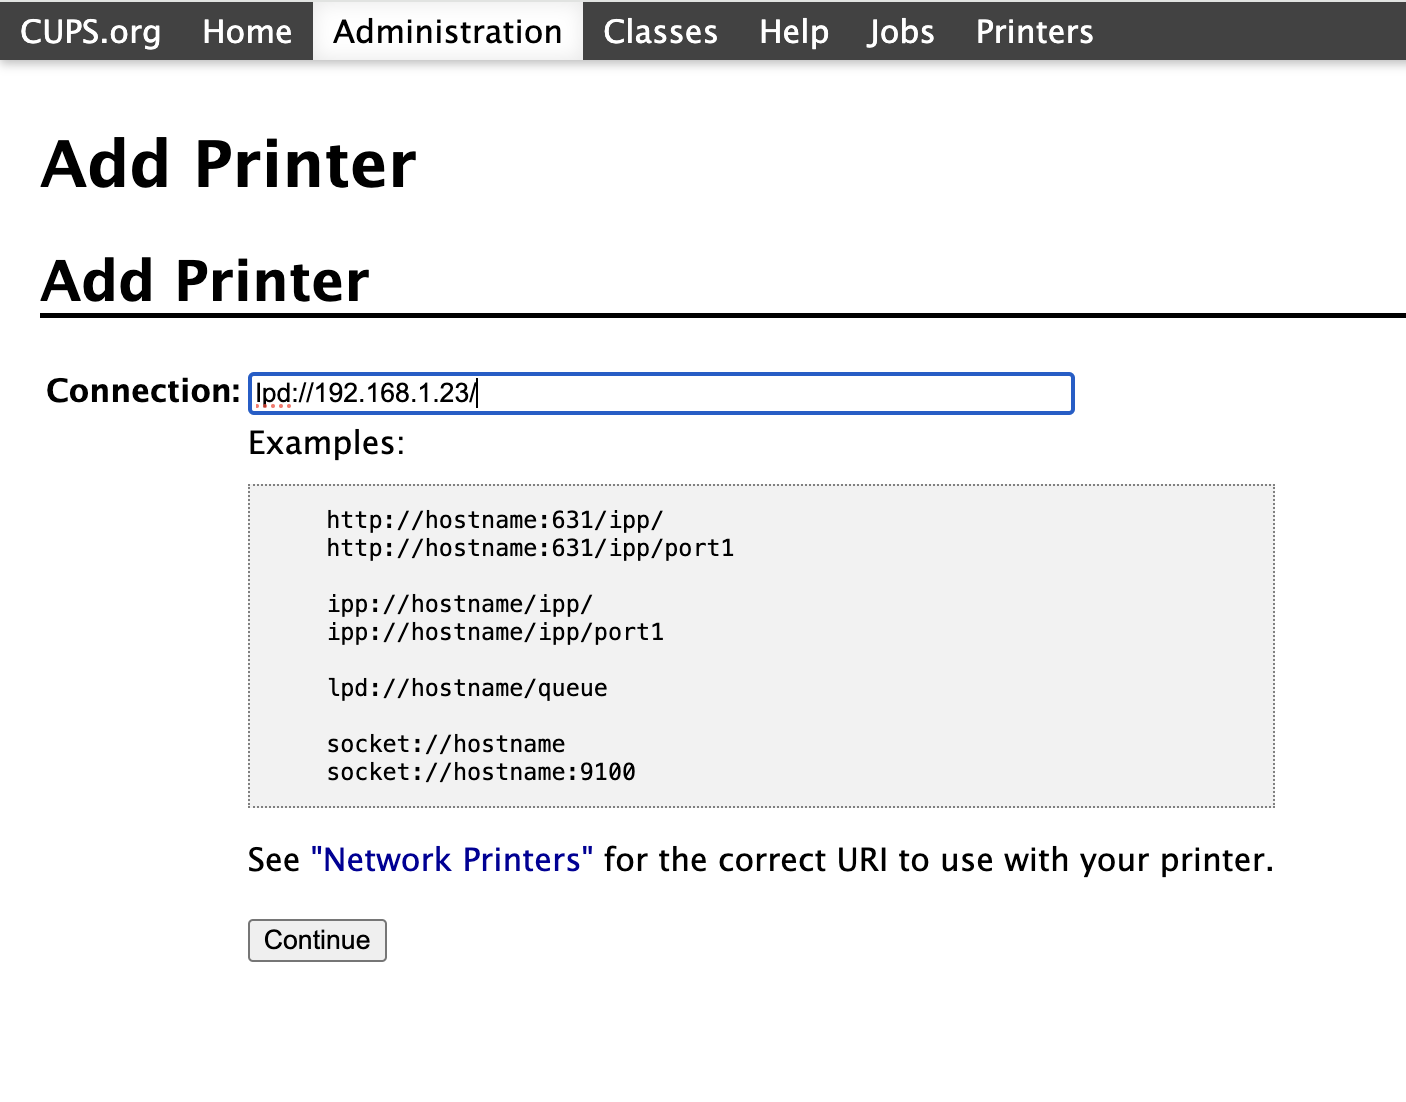
4. Give the printer a Name/Description/Location.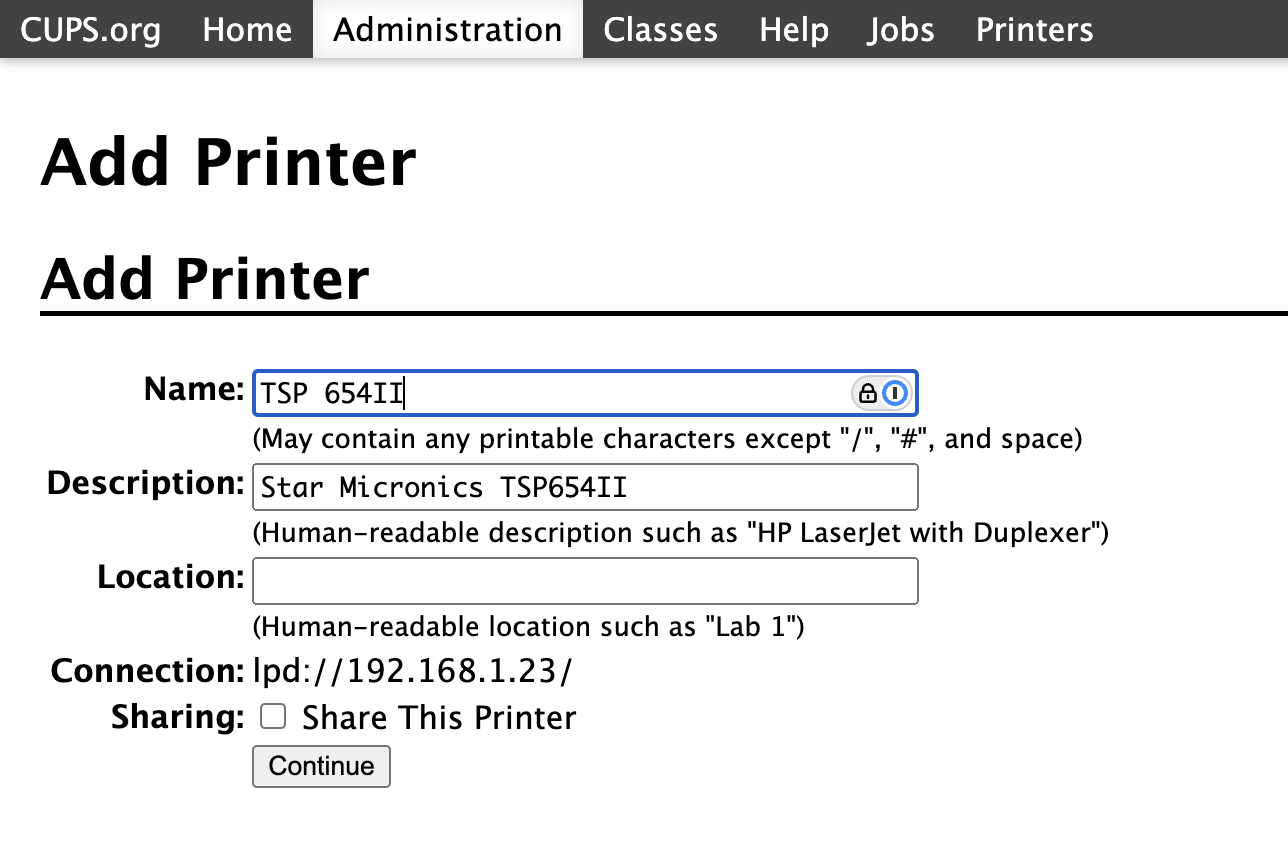
5. On the Make/Model page choose Star and then correct driver from the list.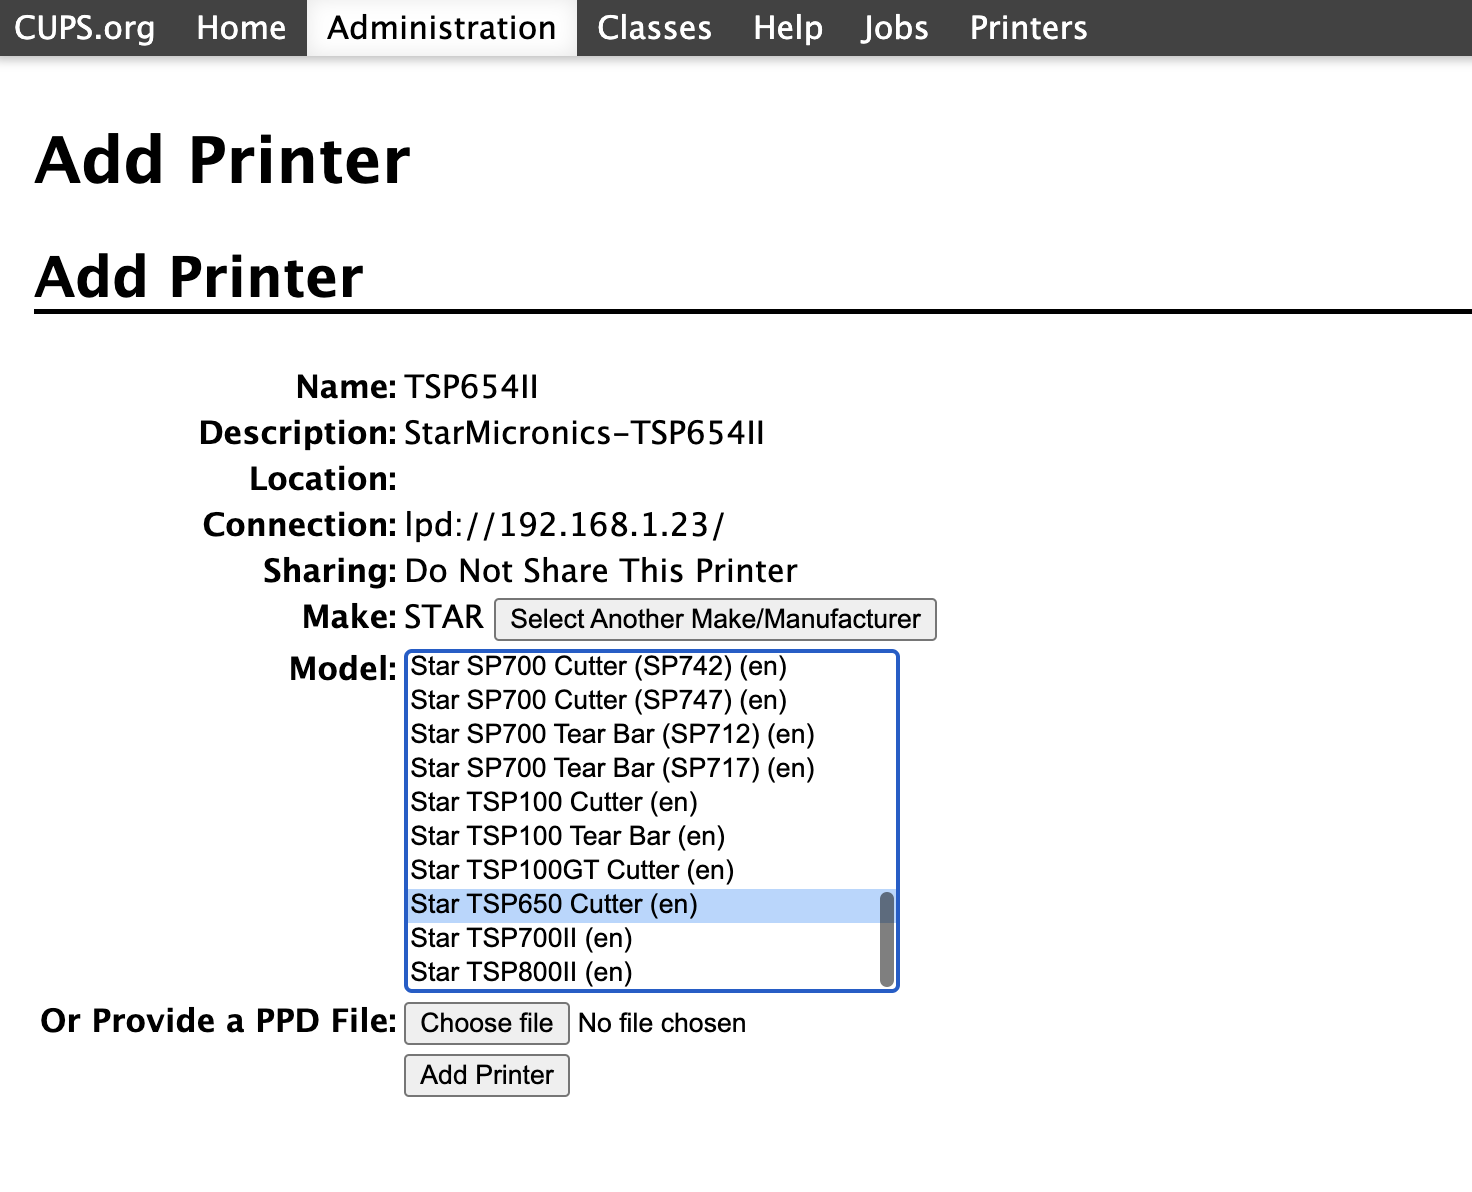
6. Click on Add Printer. After adding, click the printer and send a Test Page.
