
How to Create or Edit a Stock Tag Layout
To create a new stock tag layout or modify an existing one, follow these steps:
Navigate to 'Manage Stock Tags'
- Go to Utilities > Printing > Manage Stock Tags.
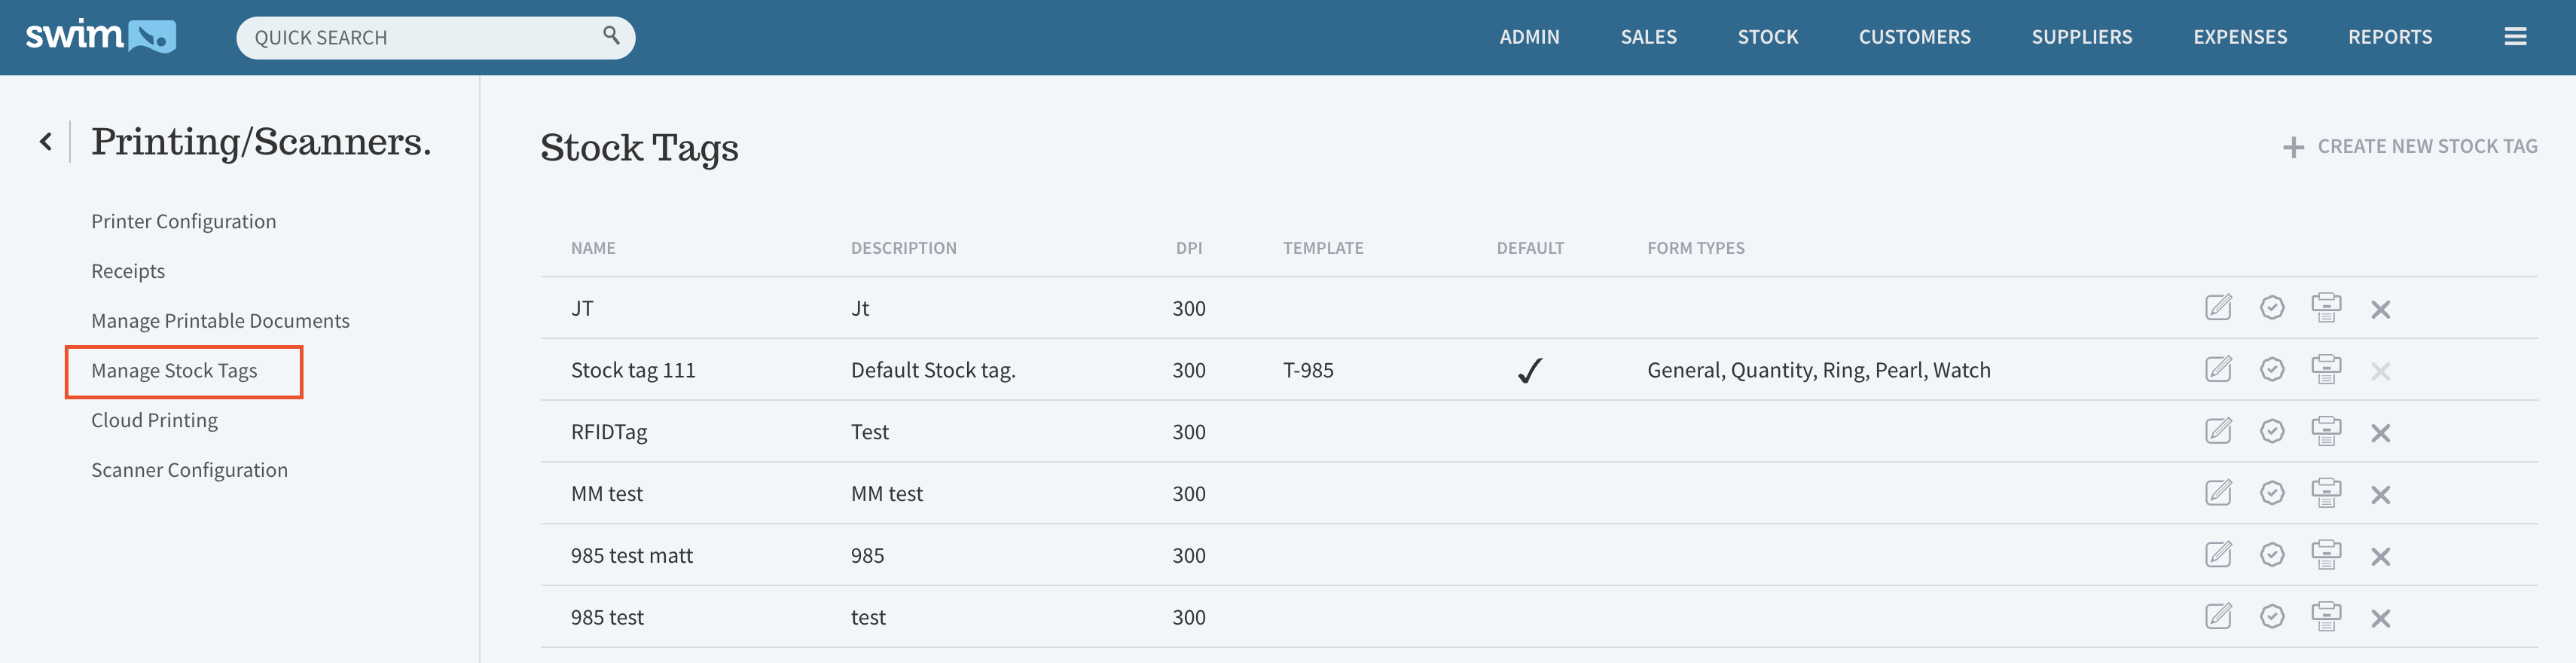
In this section, you can:- Create a new Stock Tag. (Enter a layout name and description) TIP: A good layout name is the brand of tag you are using and the description could be the model or design number of the tag.
To create New Stock Tag Click on 'Create New Stock Tag' in the top right corner.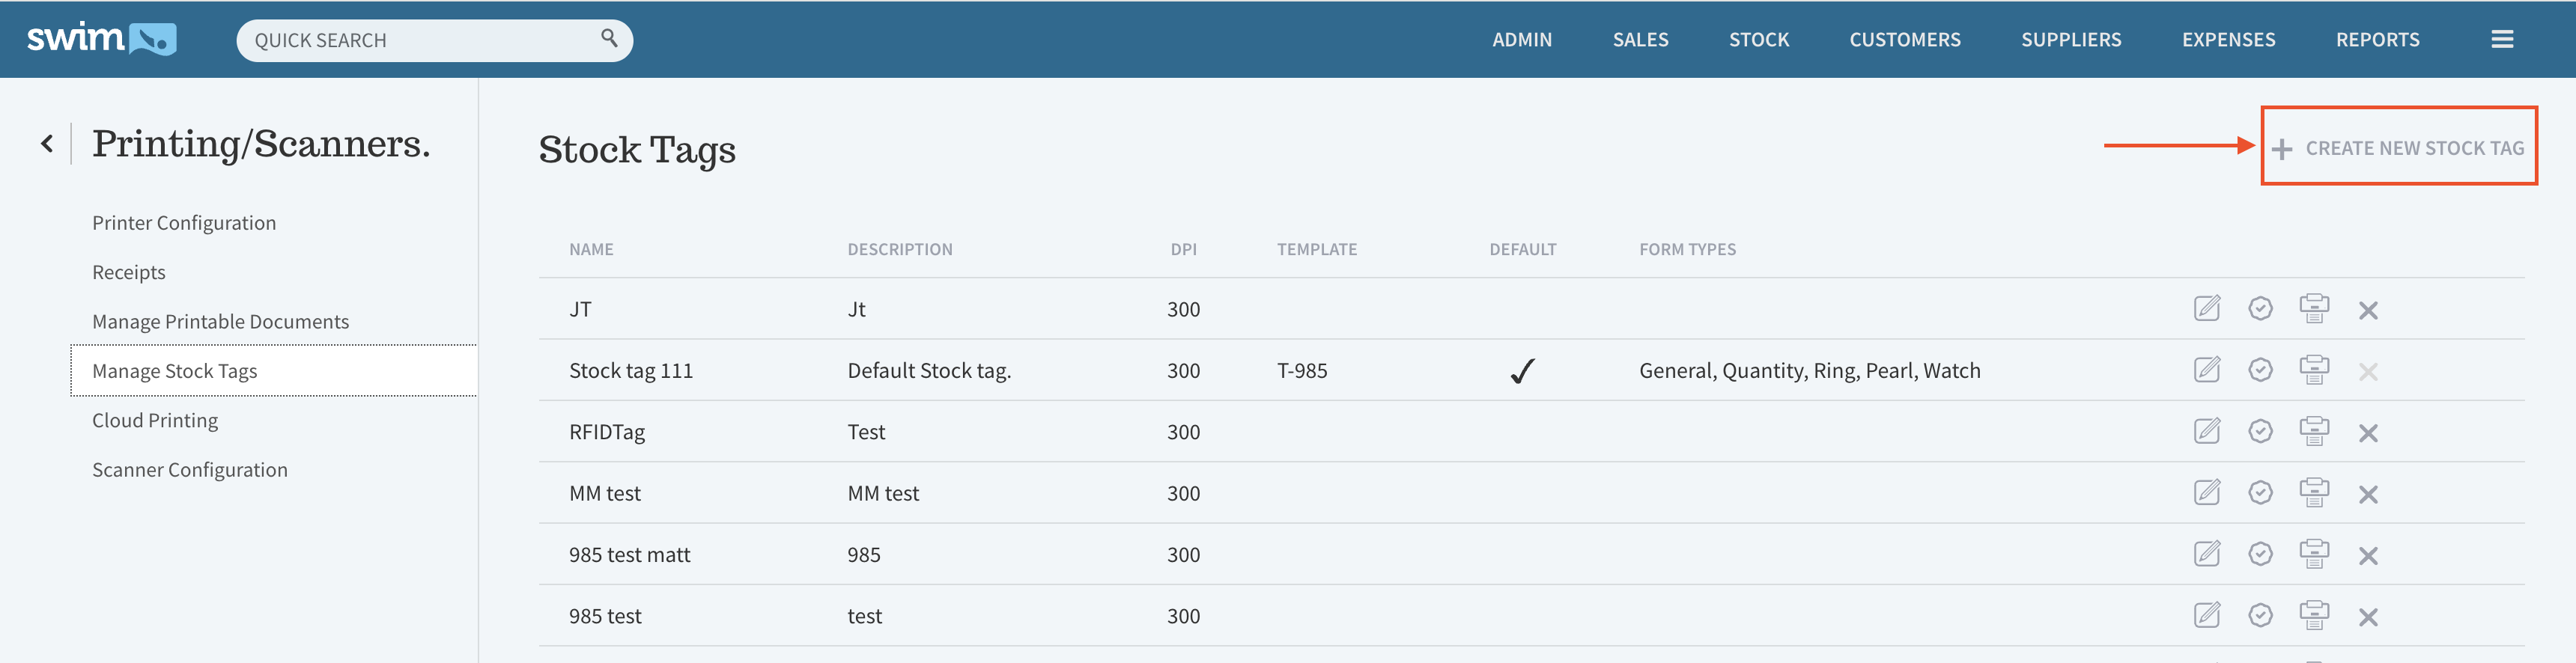
- Copy an existing tag (a useful option to create a new tag using an existing one as a template while keeping the old tag intact).
Export/Import option allows you to copy an existing stock tag layout and apply it to a newly created template. Click Export on the existing tag template, then open the new tag template and click Import to copy the layout across.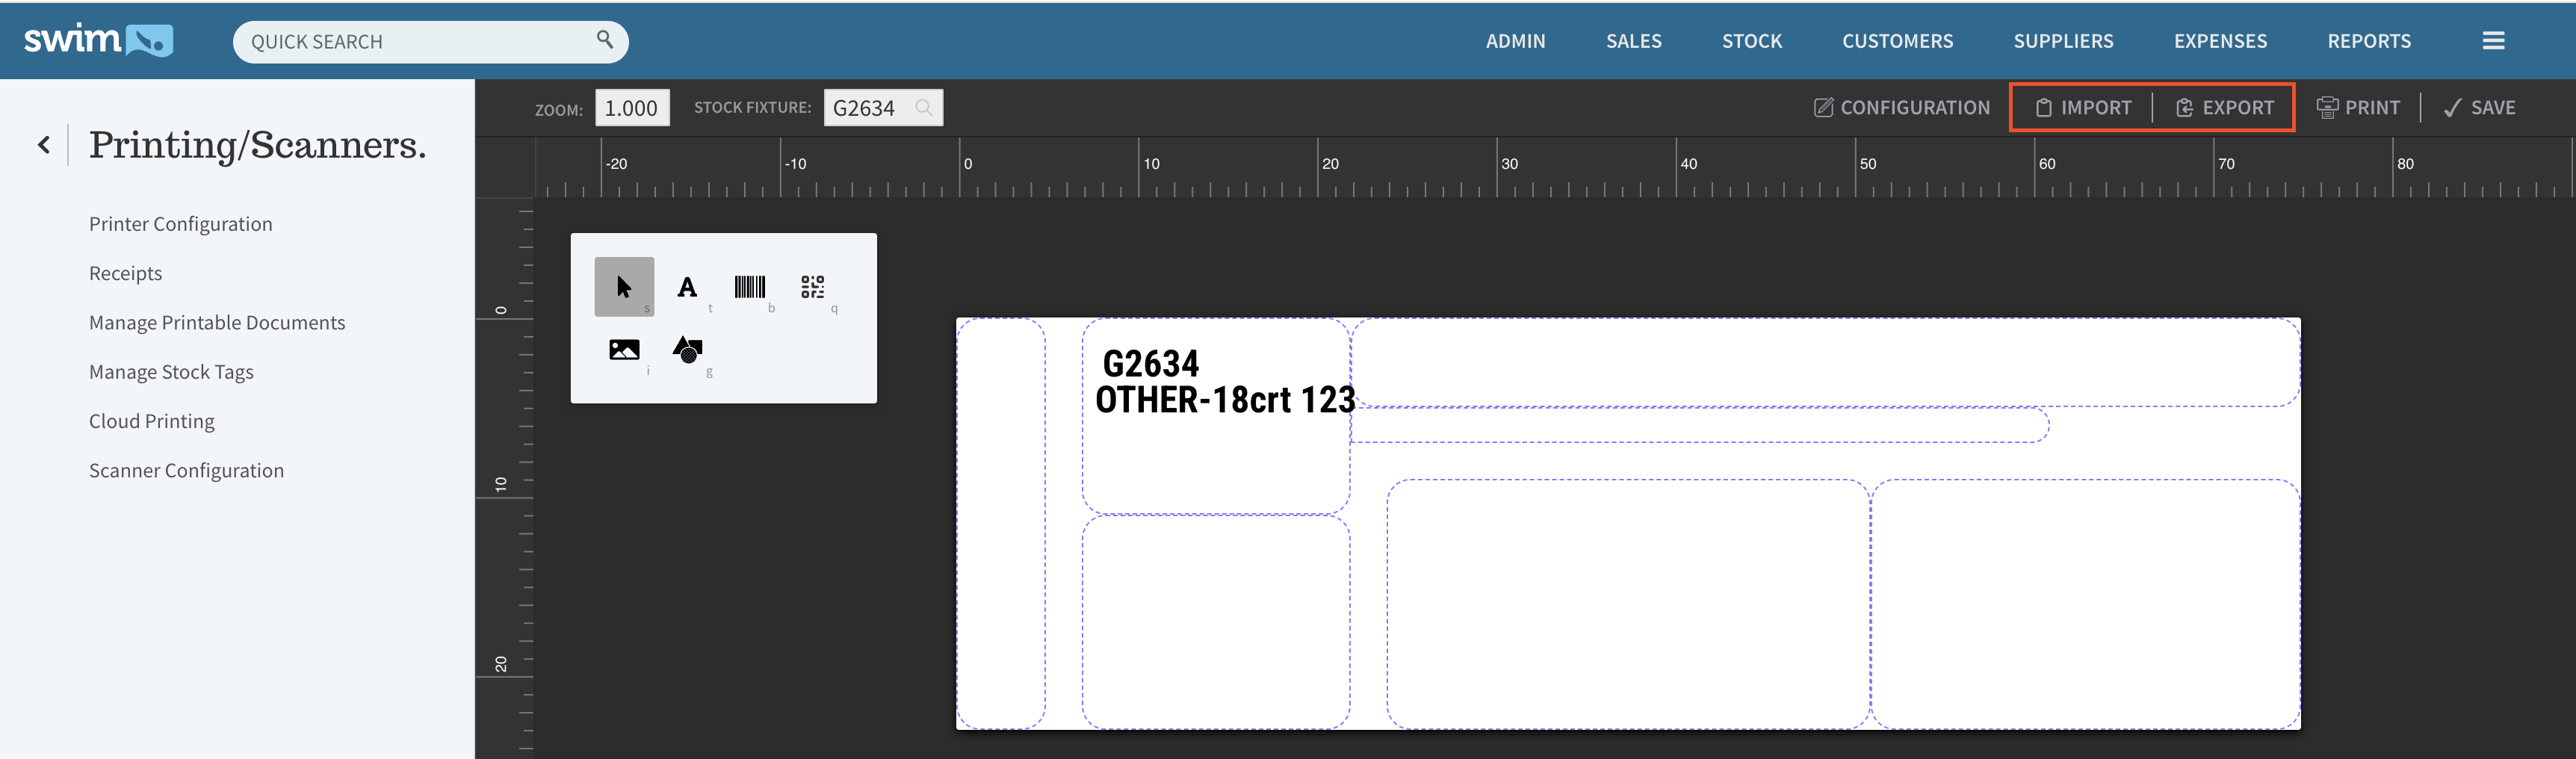
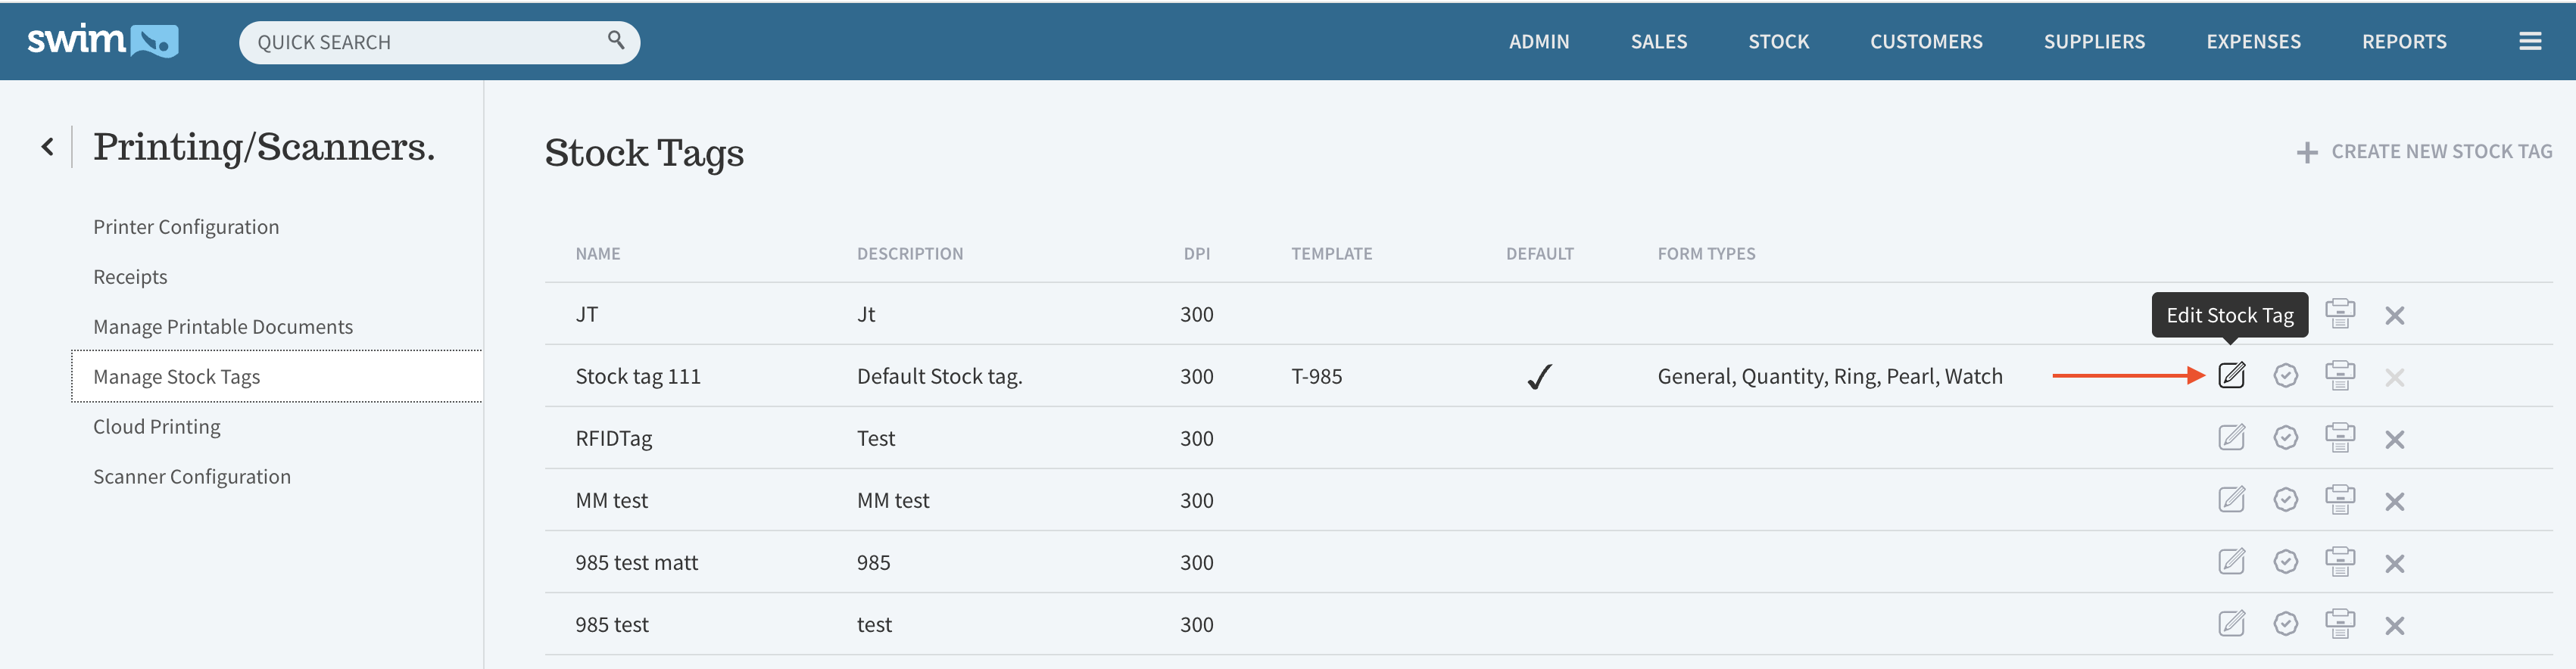
- Edit an existing tag by selecting Edit on the right of the tag name.
- Create a new Stock Tag. (Enter a layout name and description) TIP: A good layout name is the brand of tag you are using and the description could be the model or design number of the tag.
Editing and Customising a Tag
In the editing window, you’ll have access to several tools for designing your tag.
1. Adding Tag Elements
Use the top-left options panel to add elements such as: Barcode, Picture, Price, Stock Number, Line 1, Line 2, Line 3 (Custom text fields for extra information).
Select the icons and click on the template to add the elements or the stock properties.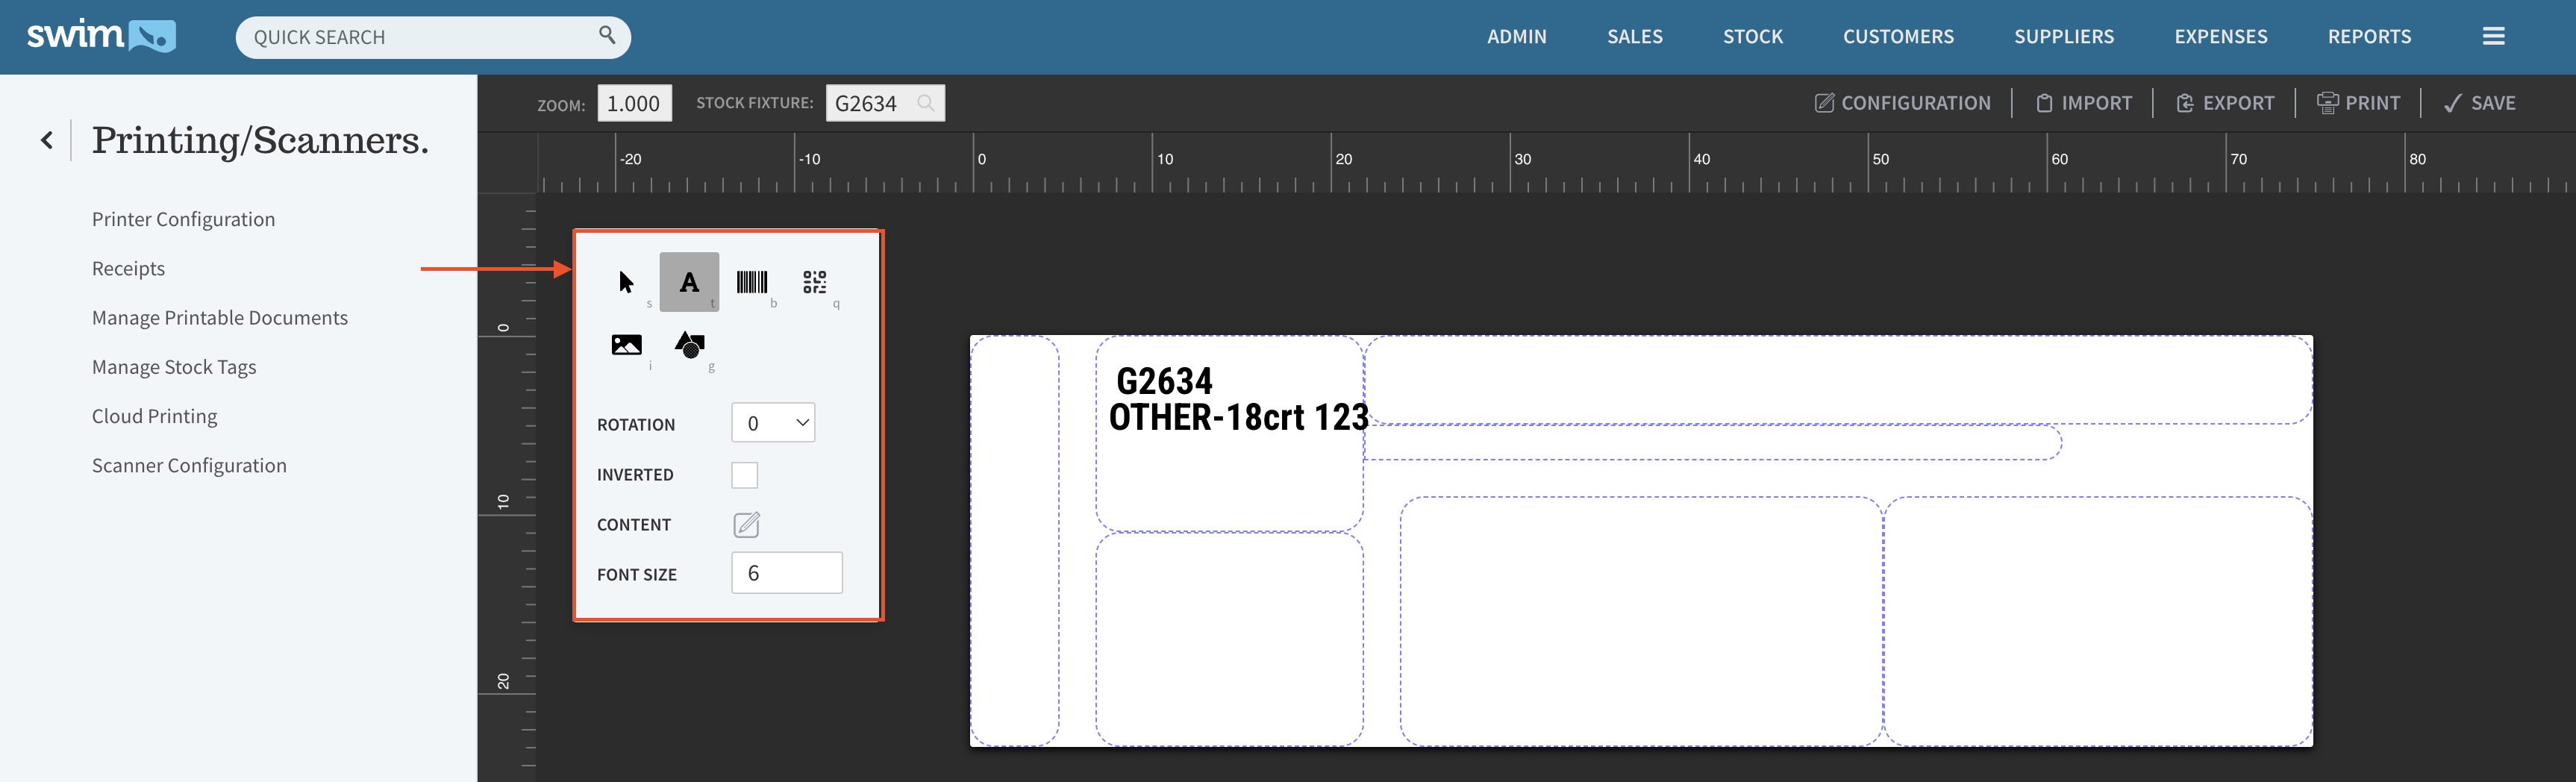
- To add the Stock Property, Click on icon 'A' and click on the template.
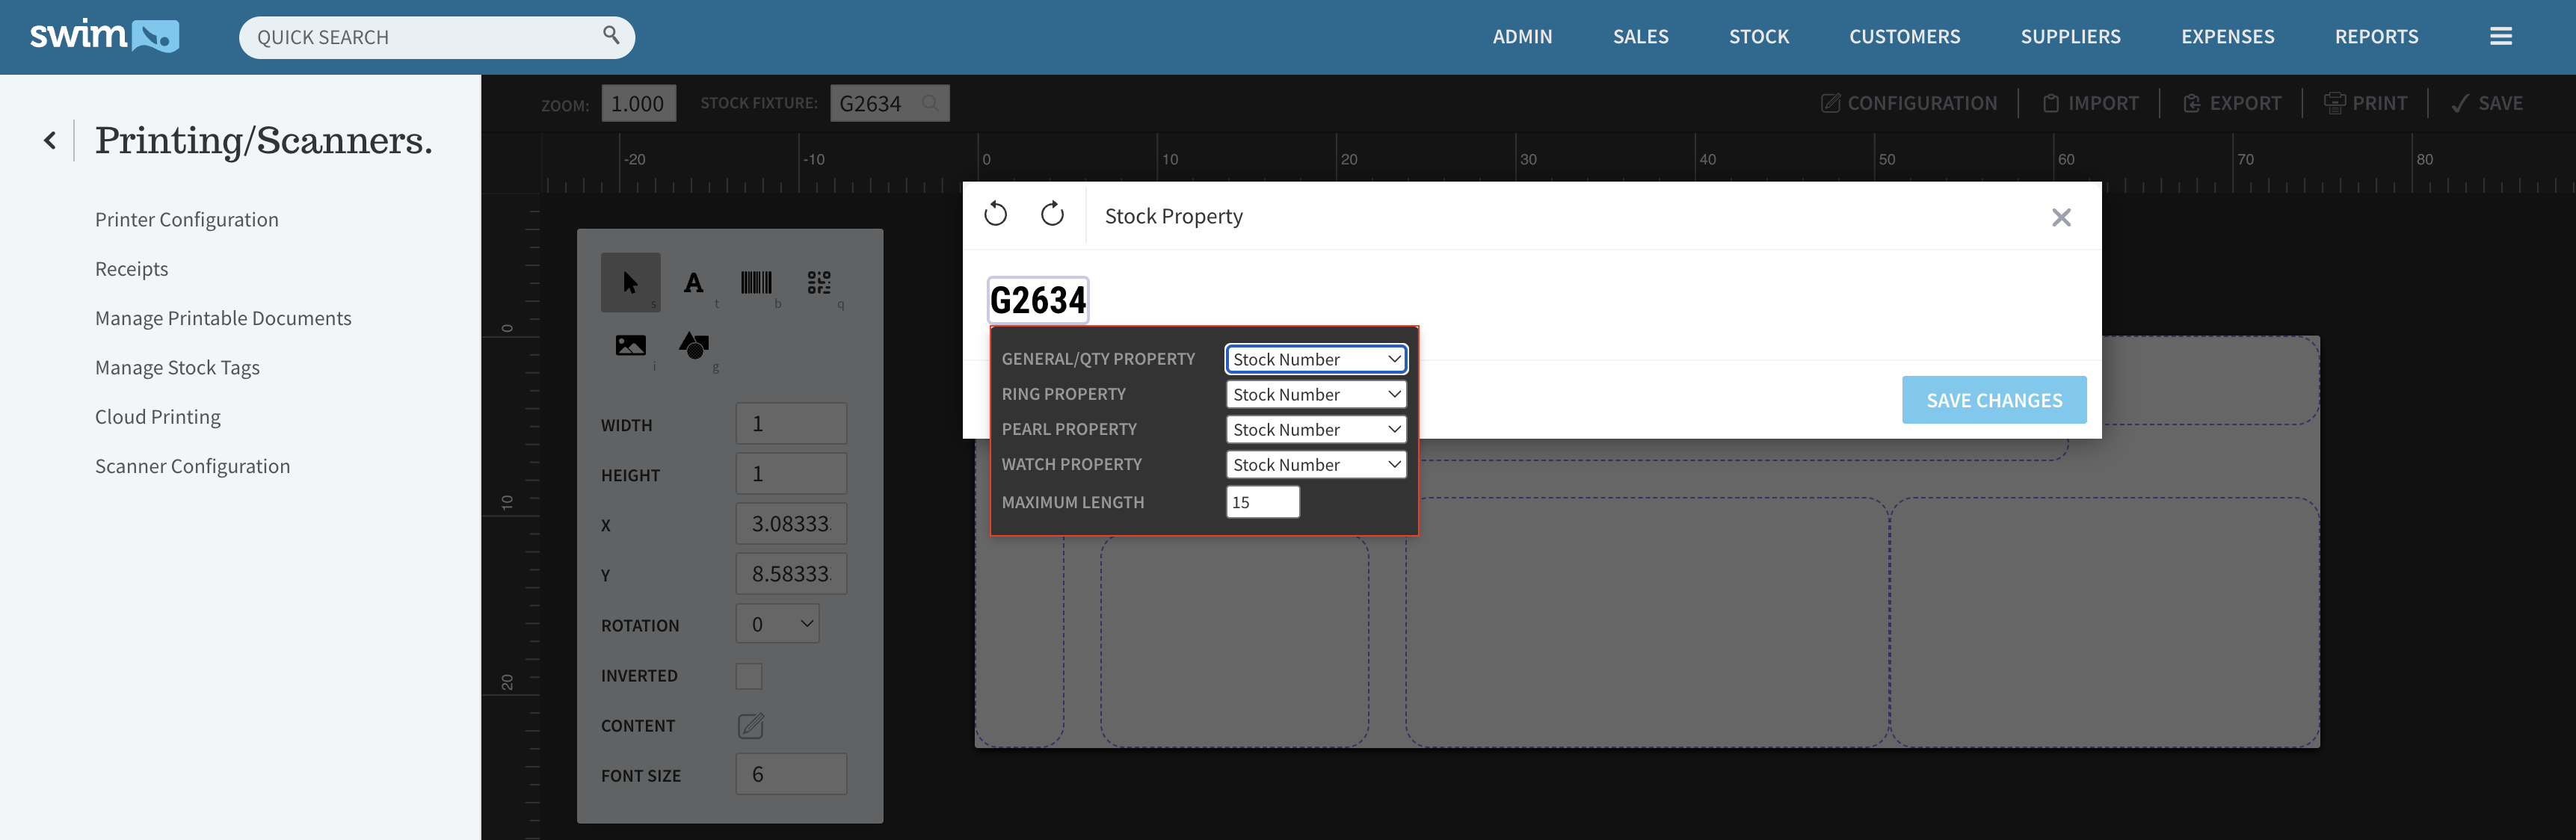
- Click on the Stock Property and click on the Stock Number.
- Select required Stock Property from the dropdown for different form type.
- Click Save Changes
2. Matching Tag Dimensions
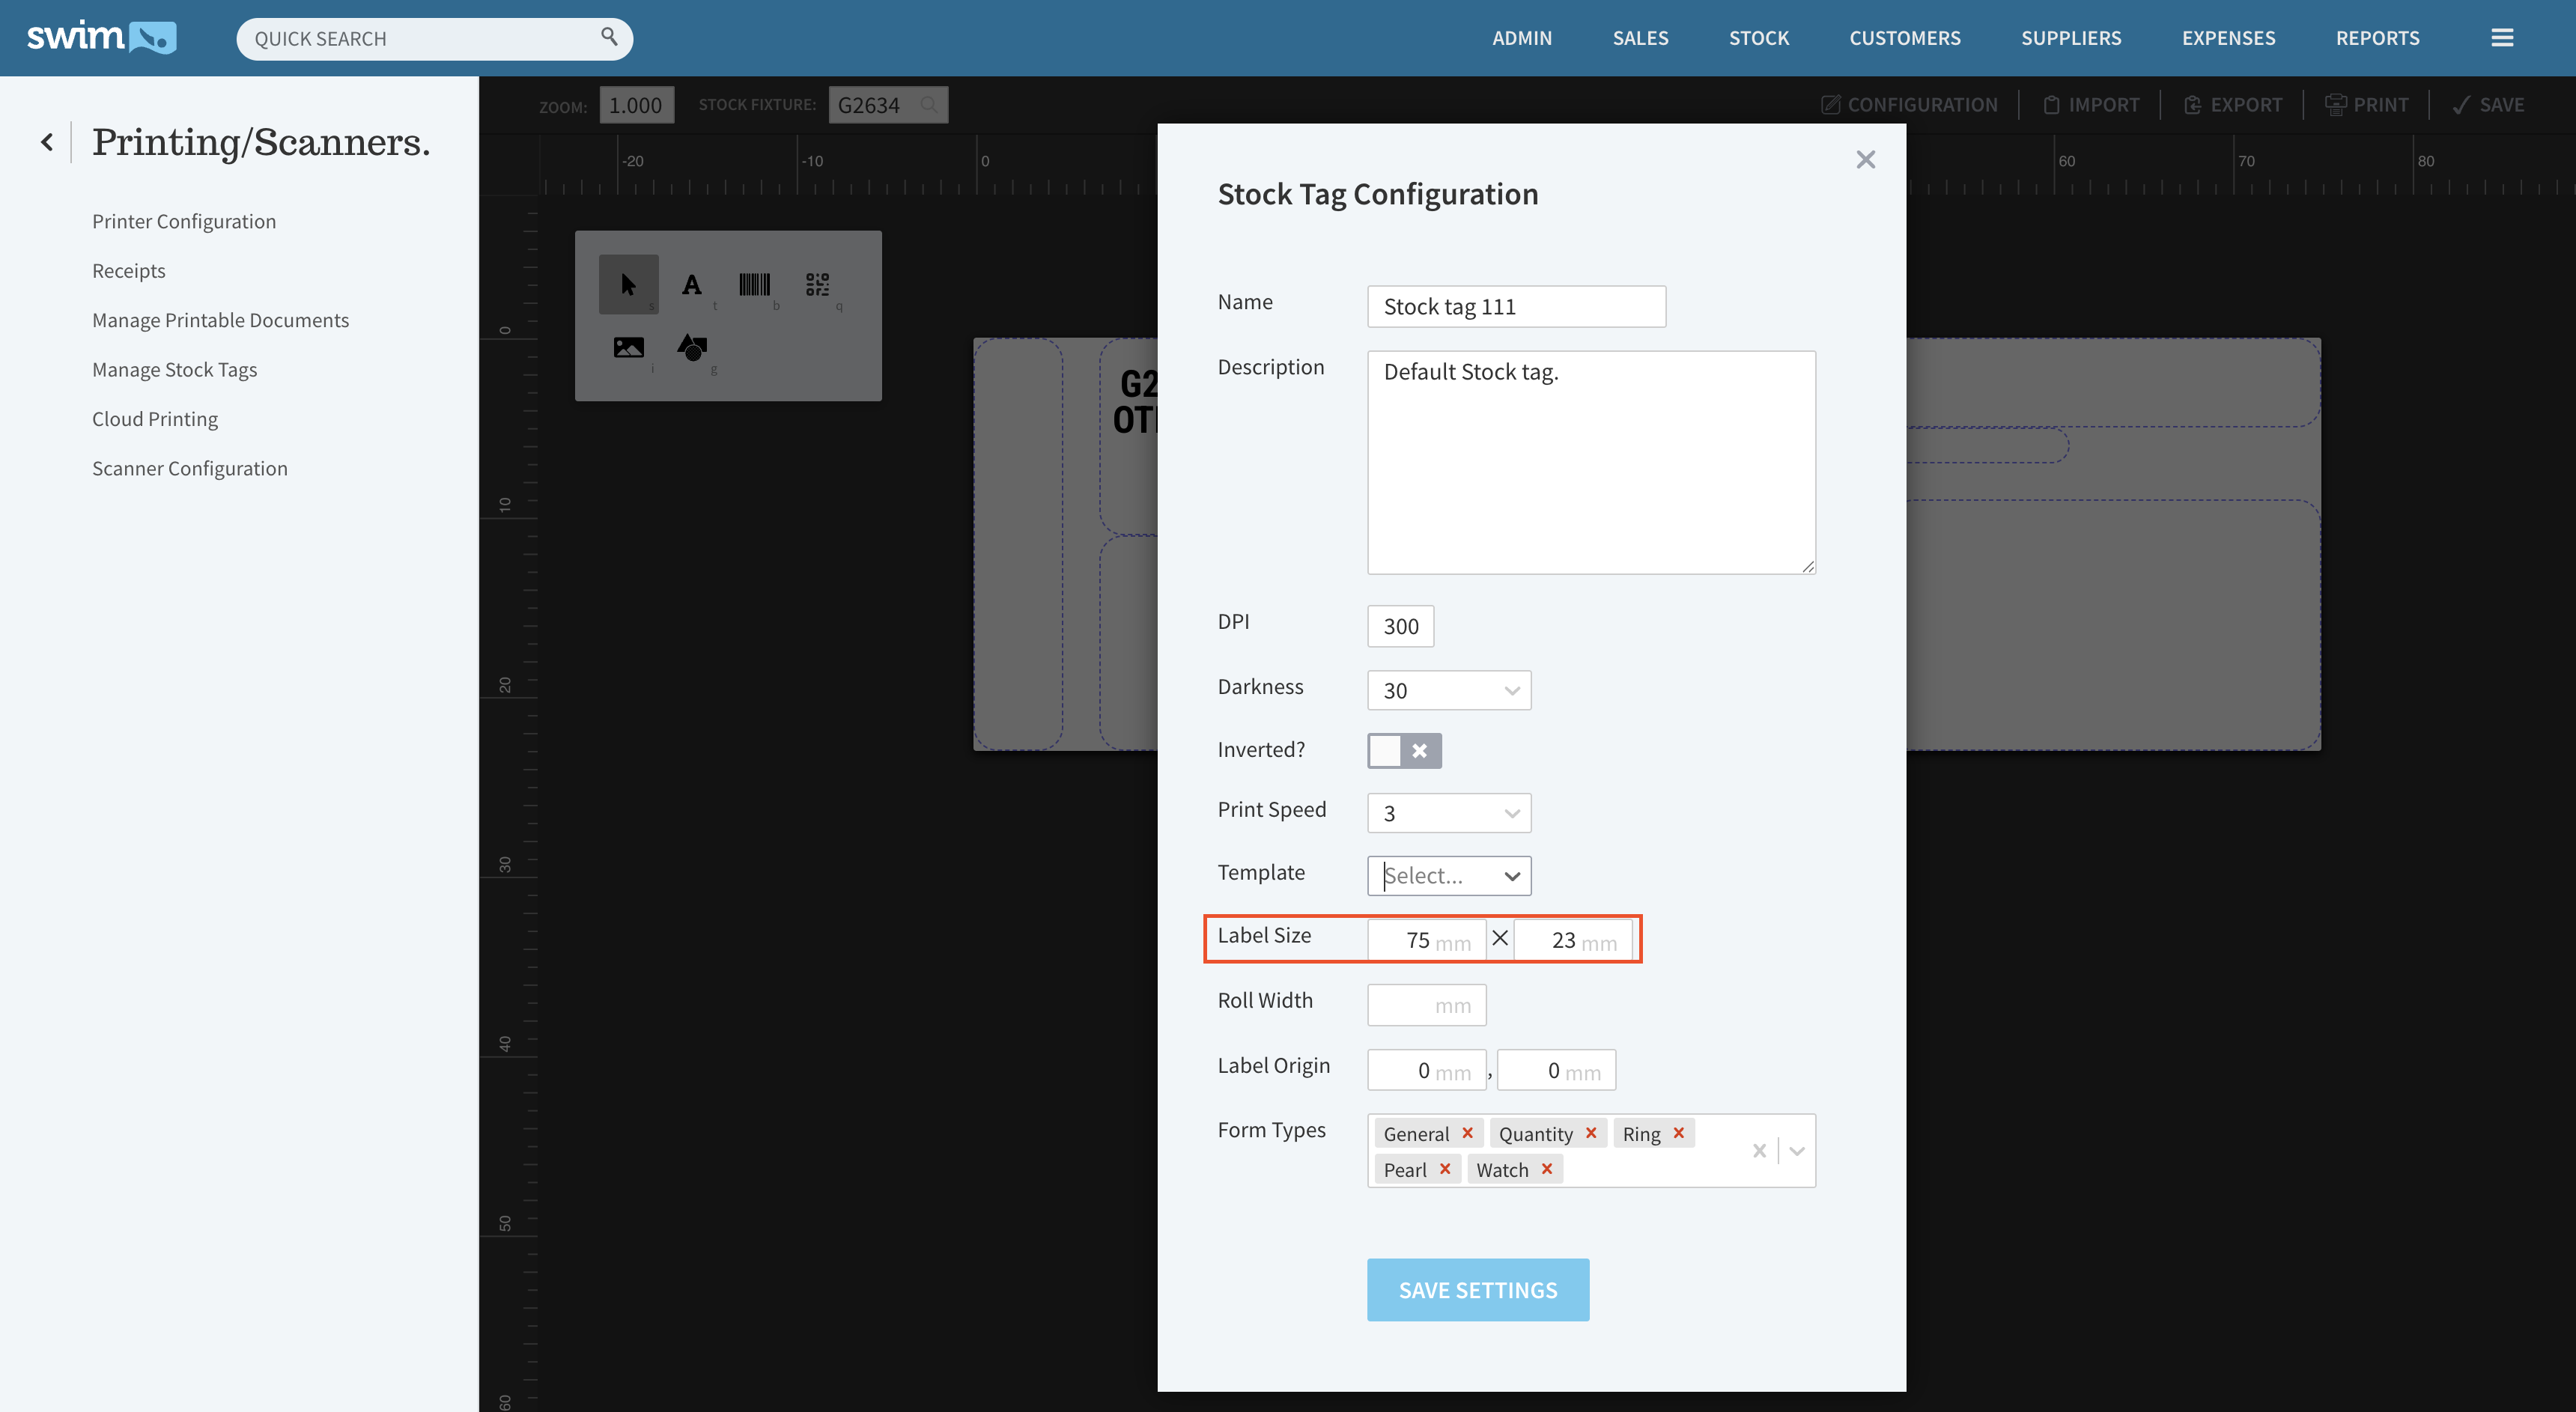
- Select Configuration to set the dimensions of your physical stock tags printable area. If you are using a Swim supplied stock tag design this step is not required.
- Ensure the measurements are entered in millimetres.
- Click Save Settings to save the dimensions and continue customising the tag.
3. Positioning and Managing Elements
Elements can be repositioned by clicking and dragging them or by adjusting the X and Y axis values in the panel. You can also modify the font size as needed. To remove an element, you can select it and press the Delete key.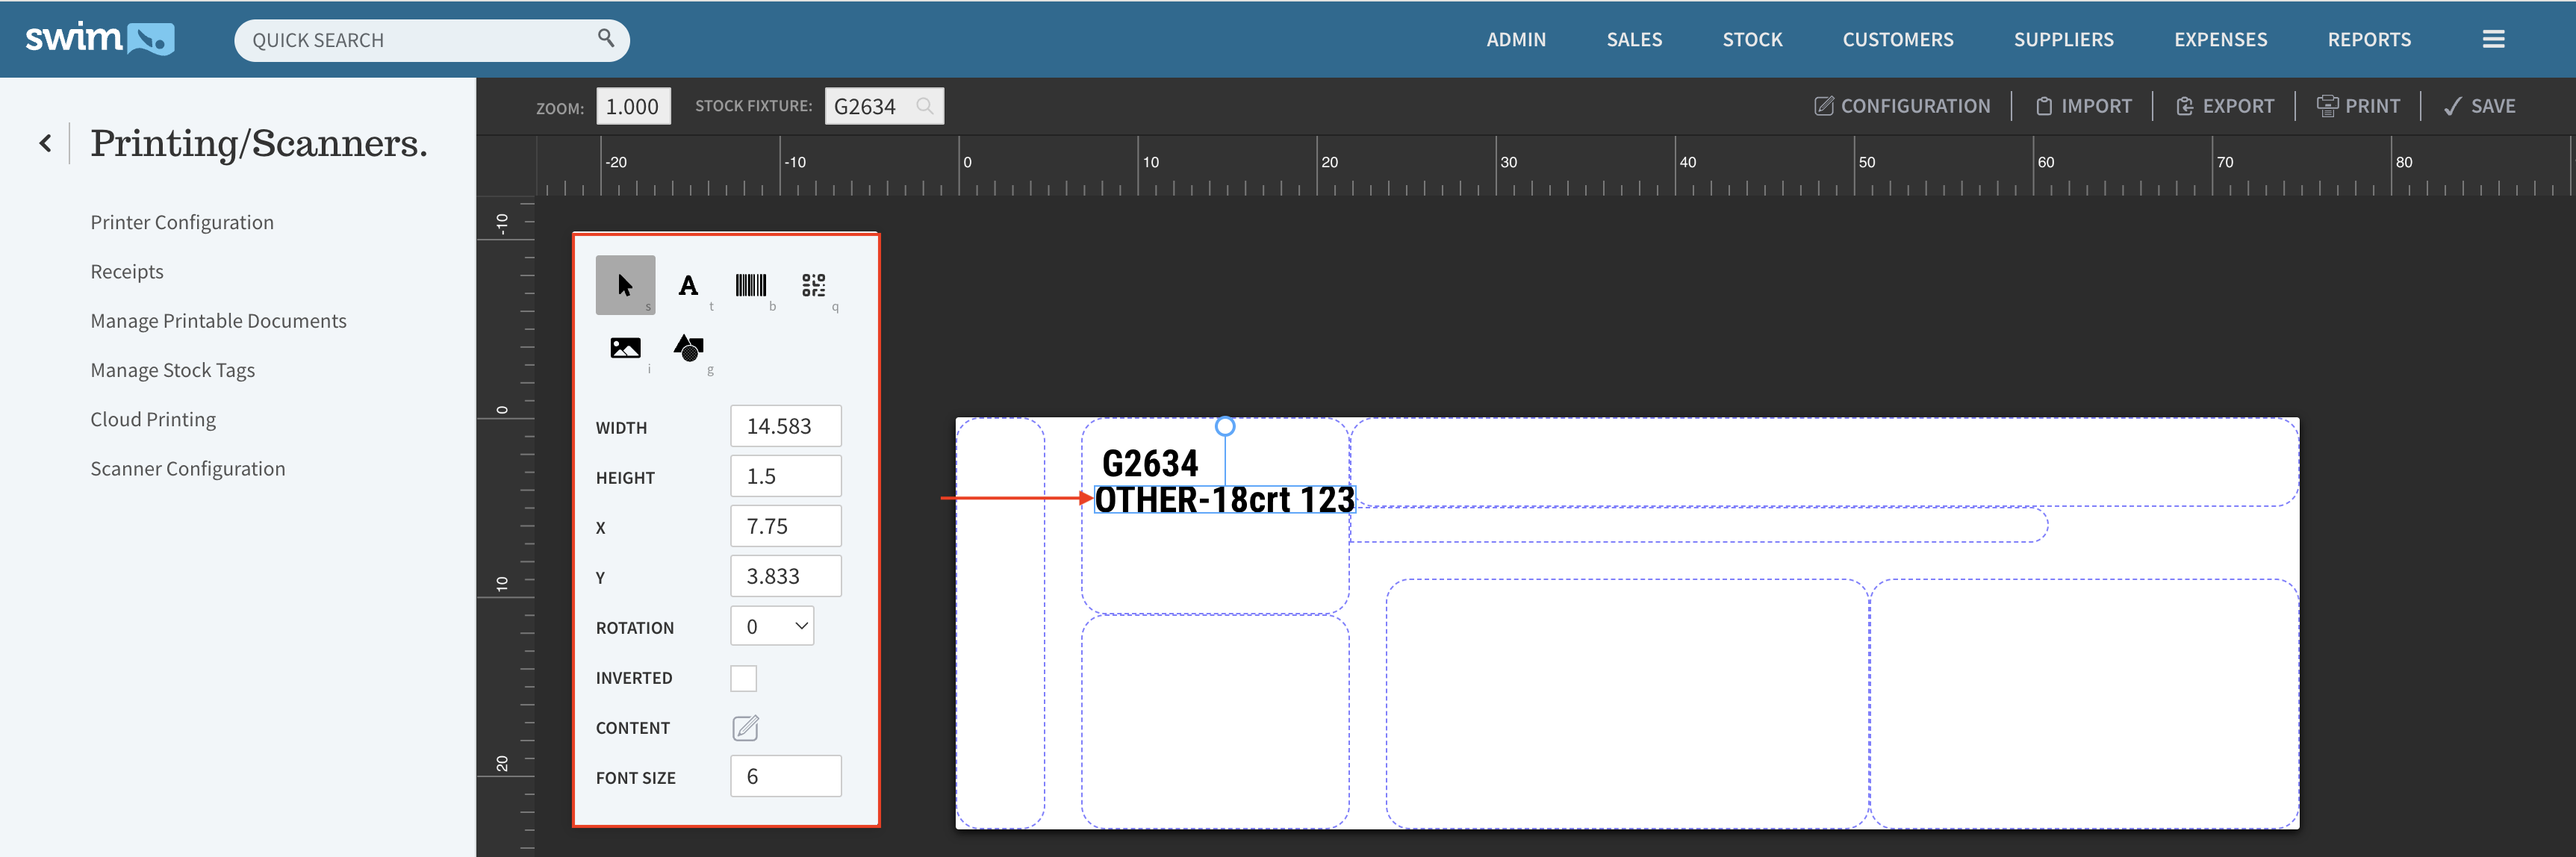
4. Saving Your Work
Once satisfied with the design, click Save at the top-right corner.
Setting the Default Tag
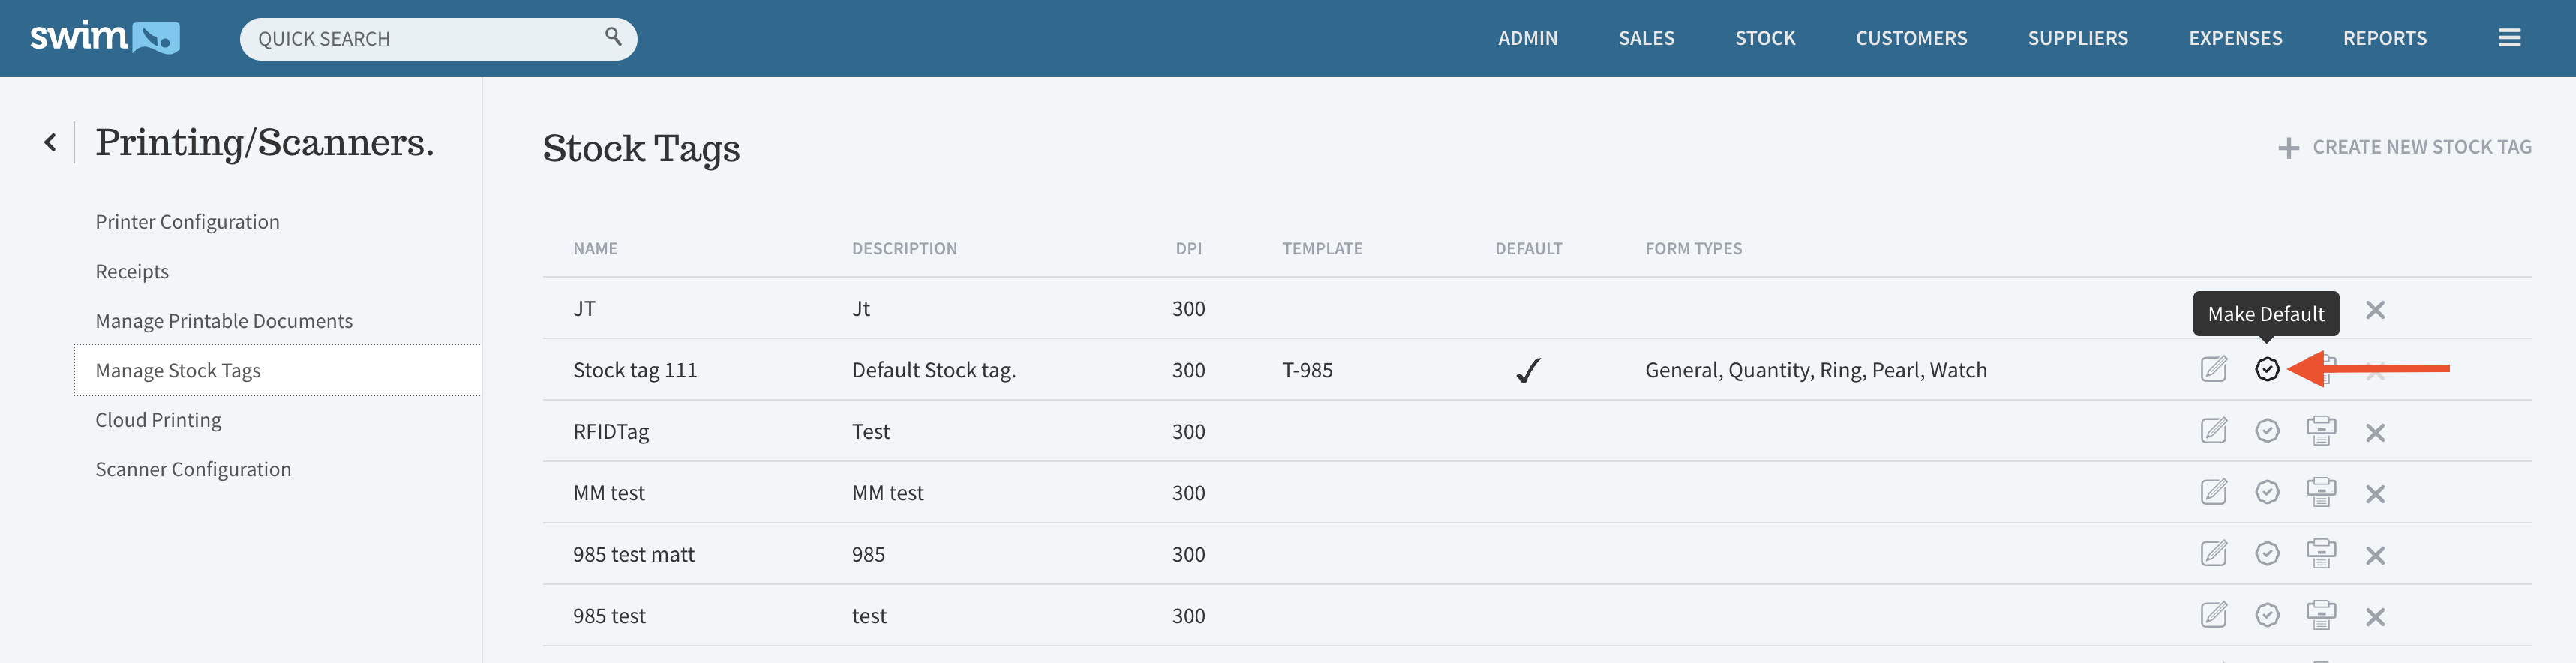
- After saving, click Manage Stock tags.
- Select Set Default next to the new tag to apply it as the default layout.
Customising Line 1, Line 2, and Line 3
These lines can be configured when editing the item’s details. For example, if you're adding a stock item from an invoice, you can update the following lines:
- Line 1: Typically used by a descriptive stock field.
- Line 2: Usually used for the Supplier Code
- Line 3: Commonly used by a descriptive stock field or Comments field offering additional information
To adjust the content of these lines, navigate to Stock Menu > Stock Tag Defaults.
Using Cost Price Coding
Many clients use Line 3 to print a cost price code—allowing sales staff to view the item’s cost price without revealing it to the customer. This is done through a feature called Cost Price Coding.
Setting up Cost Price Coding
- Go to Stock Menu > Stock Tag Defaults.
- At the bottom of the screen, select Display Cost Price Coding to view or edit the two available coding options.
- Once you choose a coding option, assign it to one of the lines by selecting Cost Price Code from the dropdown list for that line.
This guide should help you successfully create, edit, and customise stock tags. Ensure you save changes at every step to avoid losing your work.