Network Sharing a printer
Network sharing your printer across multiple computers
Note: Before you can network share your computer ensure you have completed all the steps to install and configure your printer as outlined here.
To share a printer
These steps must be completed from the computer that the printer has already been installed on and plug into, this computer will be referred to as the “host” computer.
- From the Windows Desktop on your host computer, point to the lower-right corner of the screen, move the mouse pointer up, and then click Search.
- Enter Devices and Printers in the search box, and then click Devices and Printers.
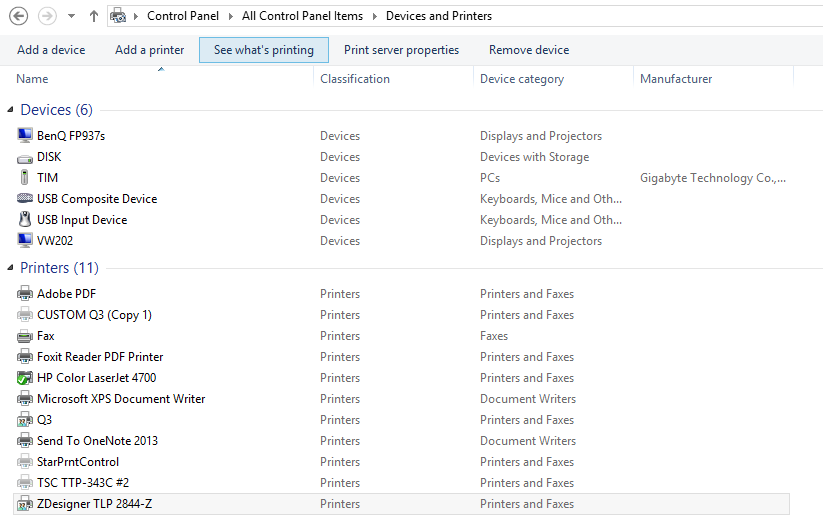
- Under Printers, press and hold or right-click the name of the printer you want to share e.g. ZebraZDesigner, and then select Printer properties.
- Tap or click the Sharing tab
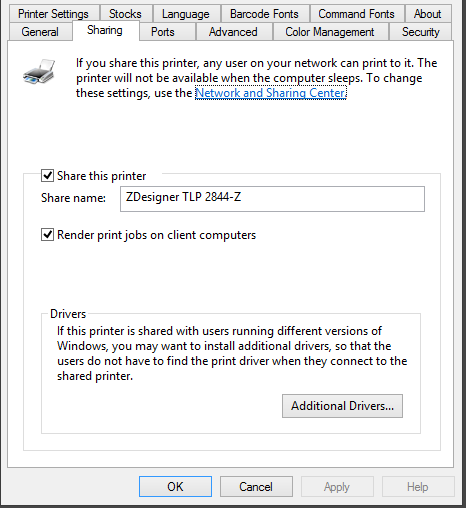
- If you see a button that says Change Sharing Options, tap or click it. You might be asked for an admin password or to confirm your choice.
- Select Share this printer.
- Click OK.
People on your network can now print to that printer whenever your PC is available. (They won't be able to print to it if your PC or printer is turned off or asleep.)
Configuring Advanced Sharing Settings
- Open Advanced sharing settings by clicking the Windows start icon/button and typing in "advanced sharing", and then clicking Manage advanced sharing settings.
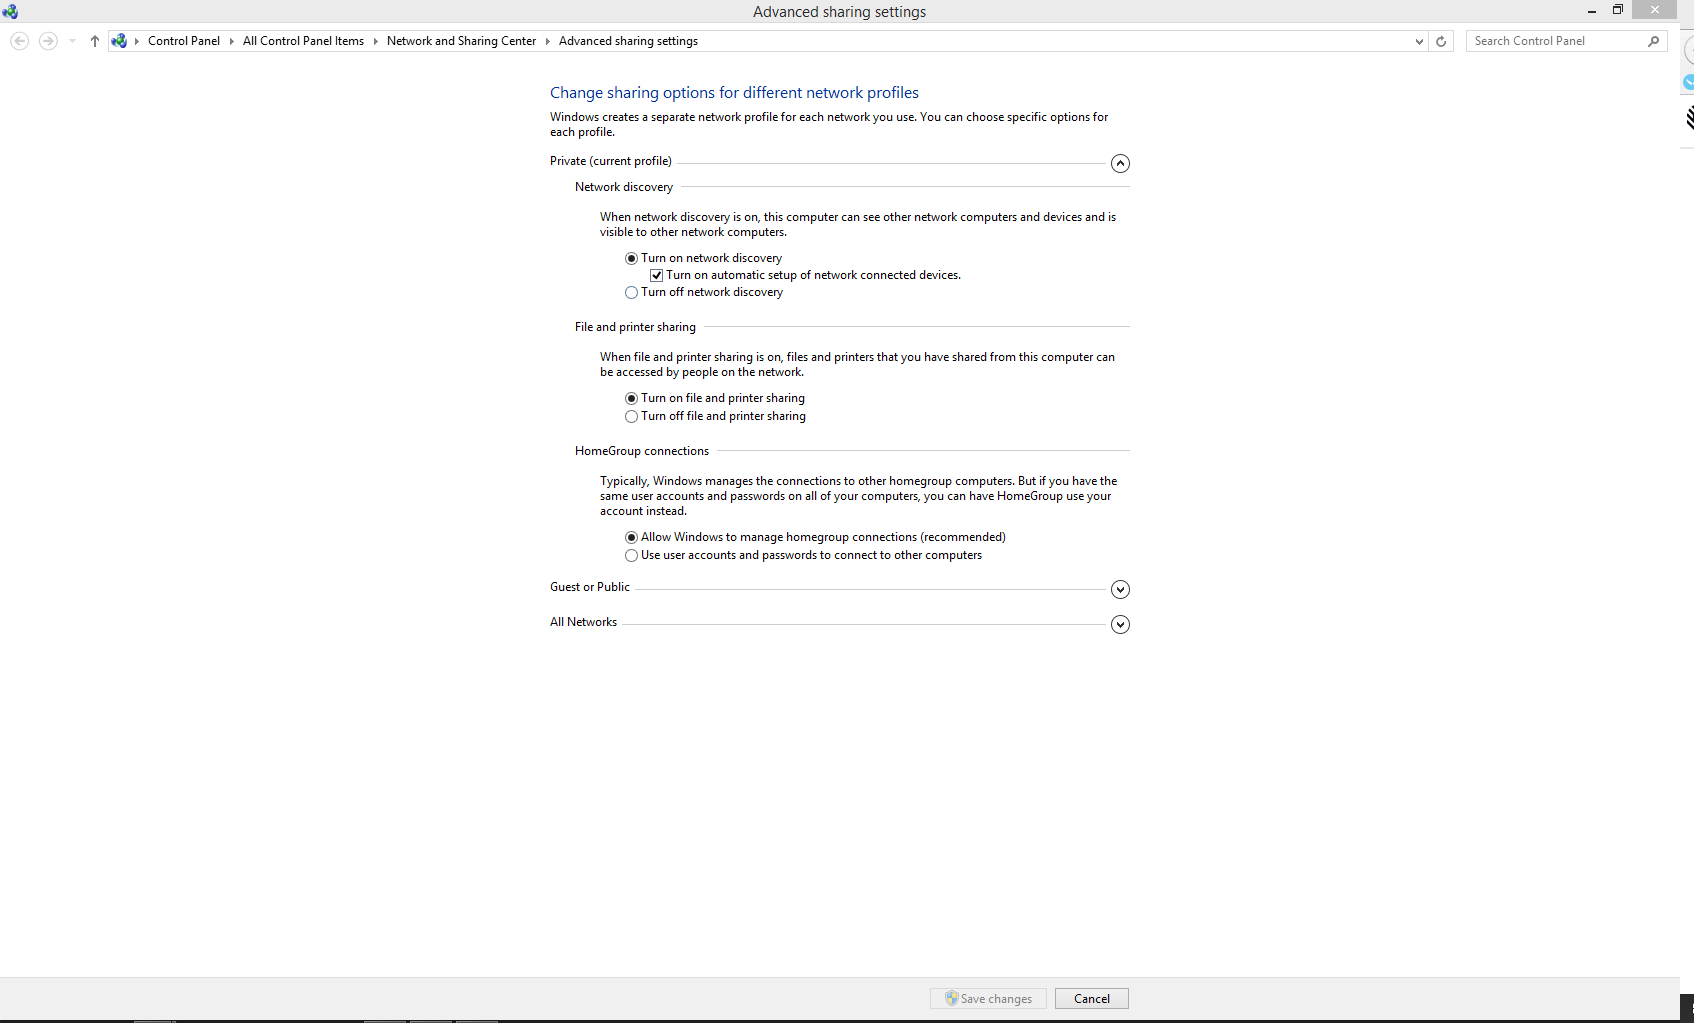
- Click on the button to the right of the network profile (private or public) that you want to turn file and printer sharing on or off for.
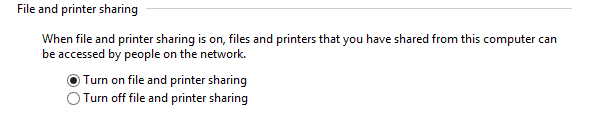
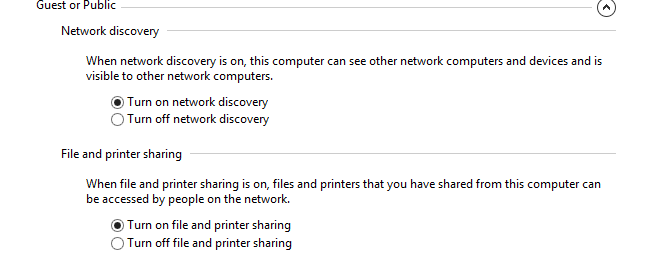
- Click the button to the right of the Guest of Public title to expand the settings, tick turn on networking discovery and turn on file and printer sharing.
- Click on the button to the right of the “All networks” title to expand the settings
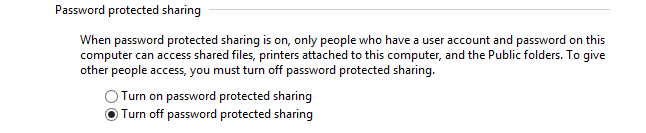
- Under Password protected sharing, select Turn off password protected sharing.
- Tap or click the Save changes. You might be asked for an admin password or to confirm your choice.
The following steps need to be completed on the computer you want to share the printer to, this computer will be referred to as the “client” computer.
- Navigate to https://www.zebra.com/us/en/support-downloads/desktop/gx430t.html
- Click on the Drivers tab and download the Designer Driver (not the Setup Utilities)
- Open the driver package and follow the install prompts to extract and install the driver, clicking next is all that’s required default settings are correct.
- On the completion page leave only “Configure System” ticked, untick all other field boxes.
- Click Finish, your computer will then be configured allowing the printer to function on it.
Configuring the Client Computer for Printer Sharing
All that is required from the client computer is repeating network changes we made earlier on the host computer except this time on the client computer.
Configuring Advanced Sharing Settings
- Open Advanced sharing settings by pointing to the upper-right corner of the screen, moving the mouse pointer down, and then clicking Search, entering advanced sharing in the search box, and then clicking Manage advanced sharing settings.
- Click on the button to the right of the network profile (private or public) that you want to turn file and printer sharing on or off for.
- Click the button to the right of the Guest of Public title to expand the settings, tick turn on networking discovery and turn on file and printer sharing.
- Click on the button to the right of the “All networks” title to expand the settings
- Under Password protected sharing, select Turn off password protected sharing.
- Tap or click the Save changes. You might be asked for an admin password or to confirm your choice.
Adding a Printer to the client computer
- From the Windows Desktop on your client computer, point to the lower-right corner of the screen, move the mouse pointer up, and then click Search.
- Enter Devices and Printers in the search box, and then click Devices and Printers.
- Click Add a Printer from the top menu bar
- From the pop up window select the name of your printer you shared from the host computer earlier and click next.