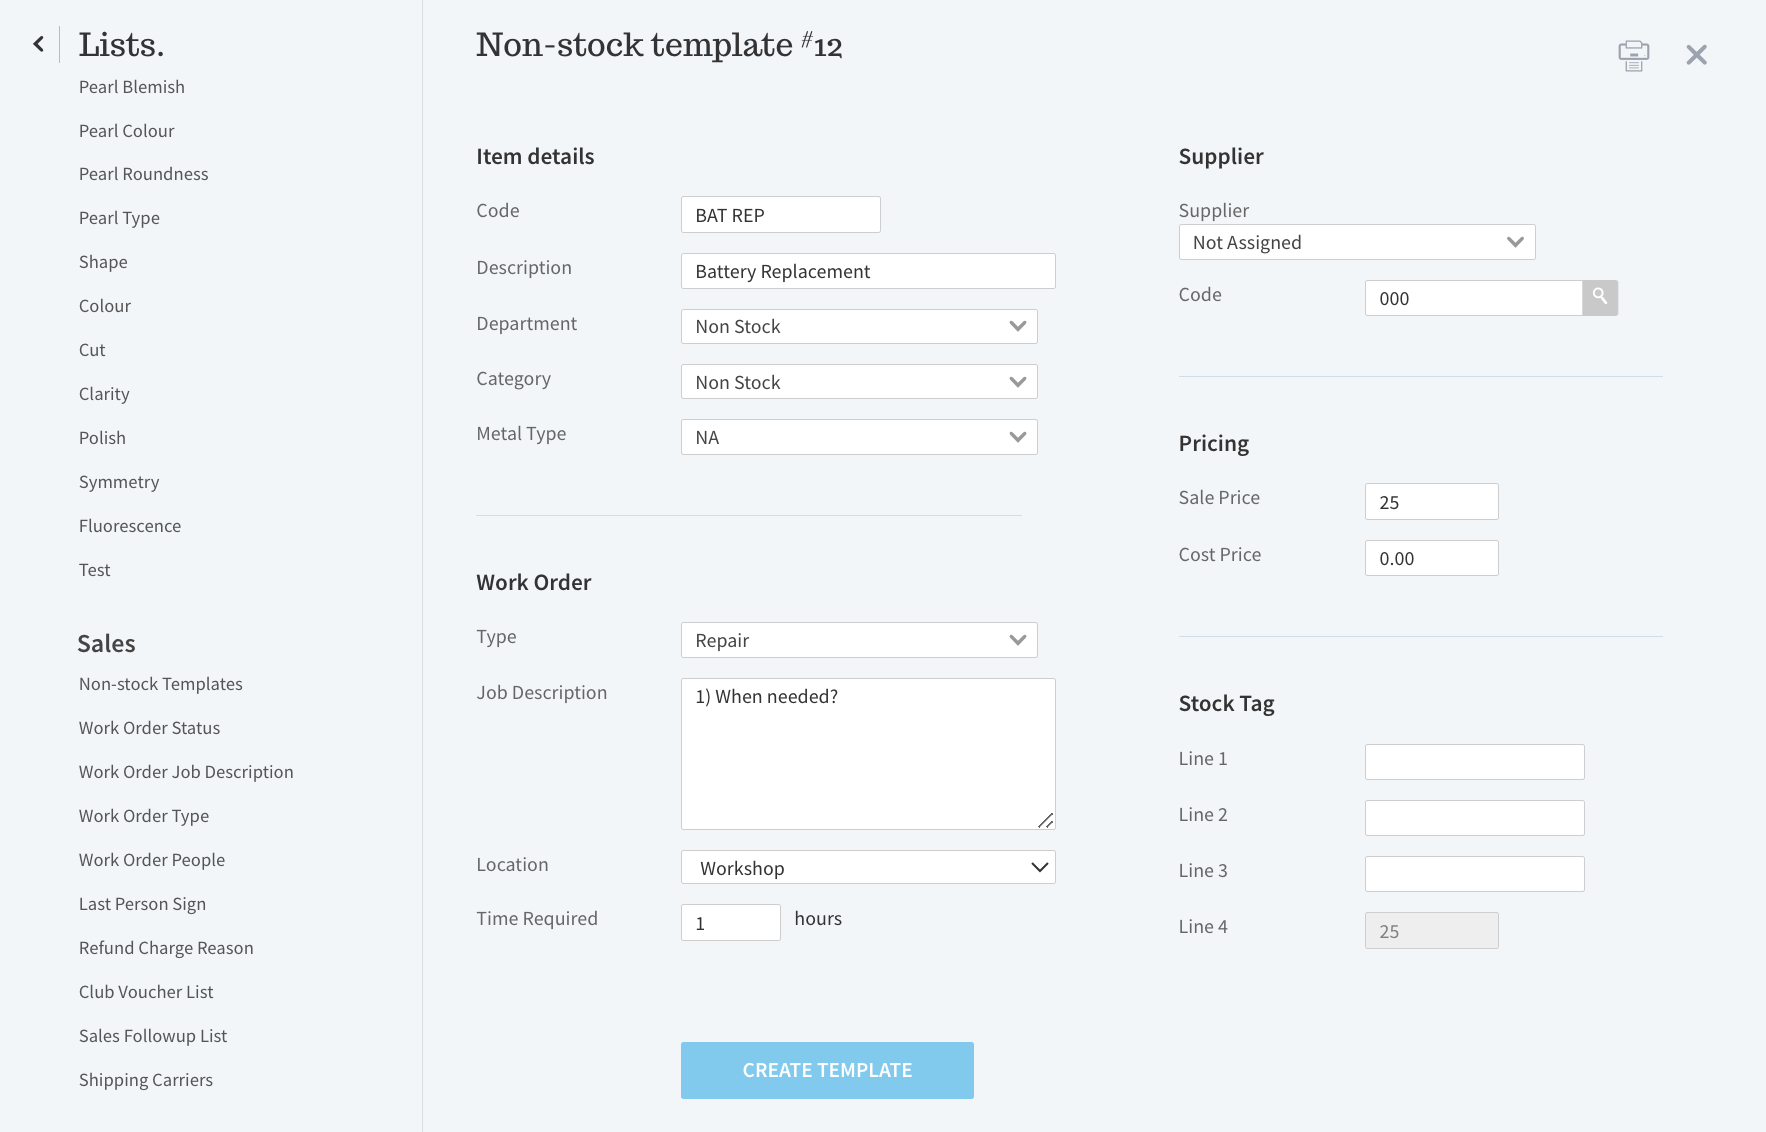
Adding a new template
- Click + New Template (upper right hand corner).
- Enter Code.
This can be alphanumeric and up to 10 spaces. - Enter Description.
This will show in the drop down list and on the receipt. - Choose Department.
- Choose Category.
- Choose Metal type.
- Choose workorder type. This is used to establish or group the type of job.
- Enter a job description (optional).
Use this field to list the work performed by default. You can also enter questions that need to be answered for the job. - Fill in the location (optional).
This is where the job will start. You can have a location of 'not started' or 'job packet'. - Enter the time required (optional).
This is an estimate and used for booking in and reporting. - Enter a supplier and supplier code (required).
This is the person/company/area performing the task or providing the item. The supplier code can be the same as the non stock item. - Enter the cost and sell price.
This is just a default and can be changed. You can leave these as zero and enter on the sales screen. - Fill in the tag details if you wish to print a tag.
- Select create template.
The tasks will appear on the workorder popup on the sales screen. To learn more see https://support.onswim.com/knowledgebase/532/06-How-to-add-tasks-assign-tasks-and-book-in-the-calendar.html


